
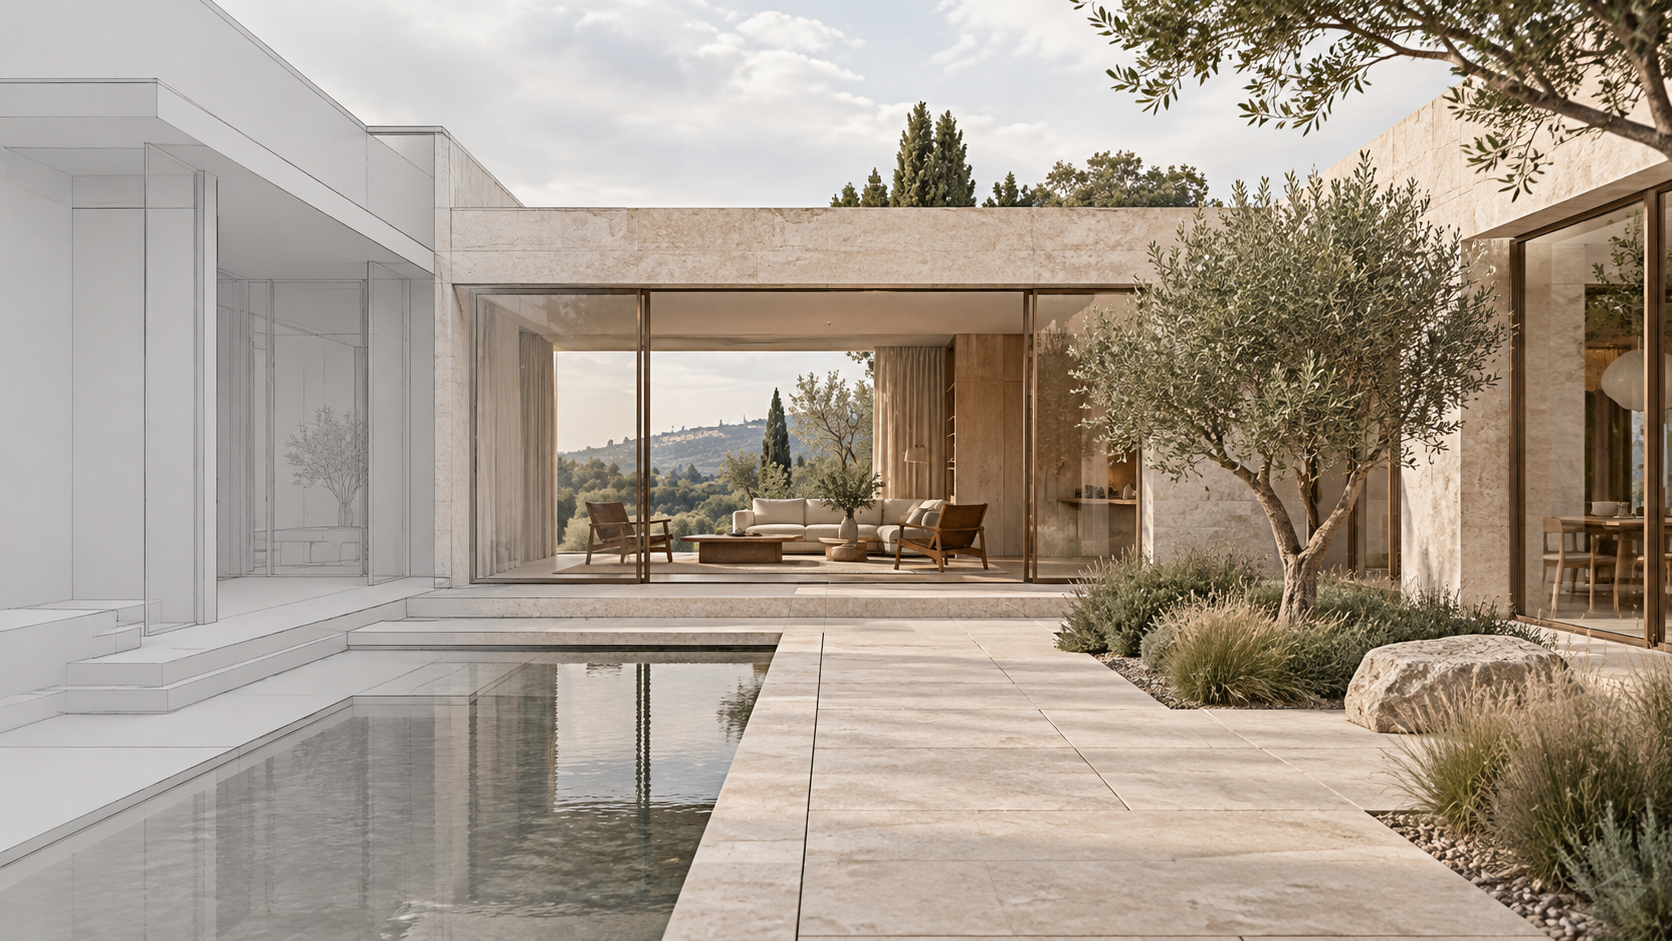
Write GPT Image 2.5 prompts for new images and targeted edits. This guide covers prompt structure, what to change, and what to preserve. Architecture, interior design, and landscape examples show how to apply the same principles to your own subjects.
Find the tool on RunDiffusion
- Log in to RunDiffusion.

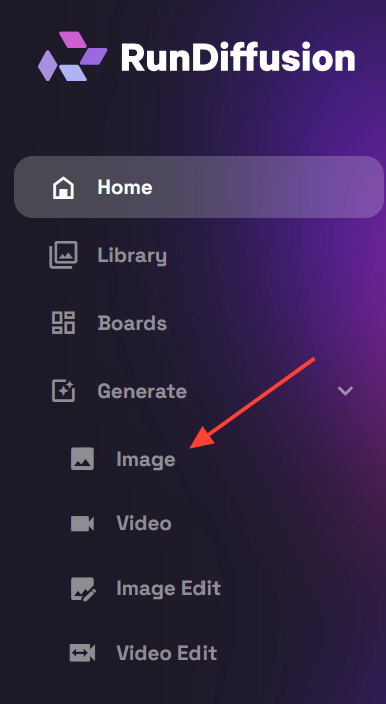
- On the left sidebar, click Generate, then select Image.
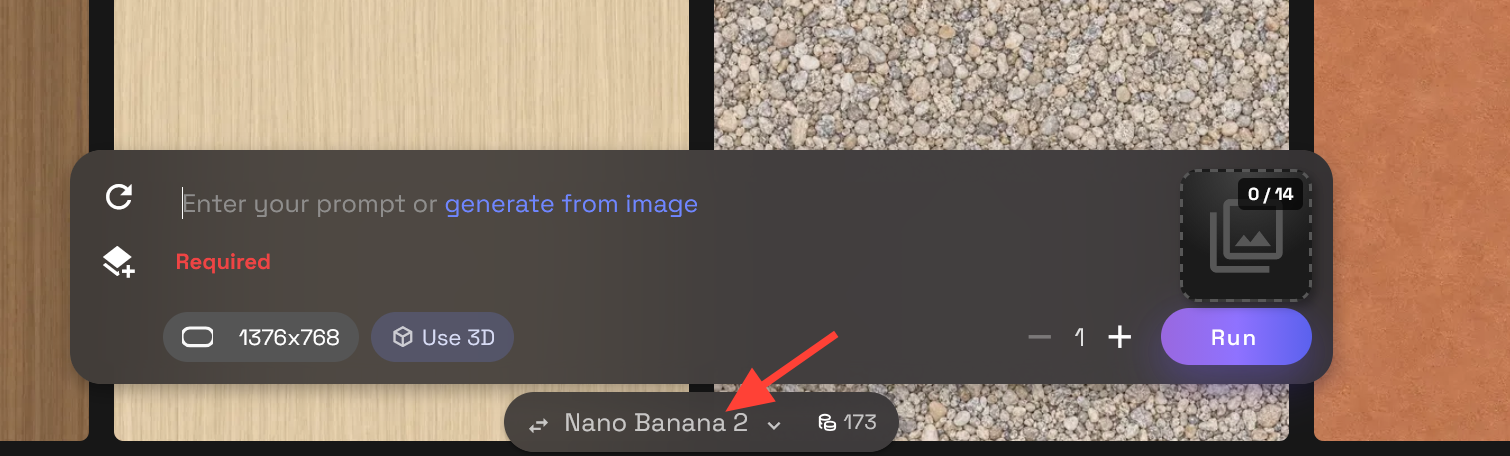
- Click the current model name at the bottom of the tool to open Choose Tool.
- Open Tools and search for ChatGPT Image 2.5. Select Flare or Sunburst.
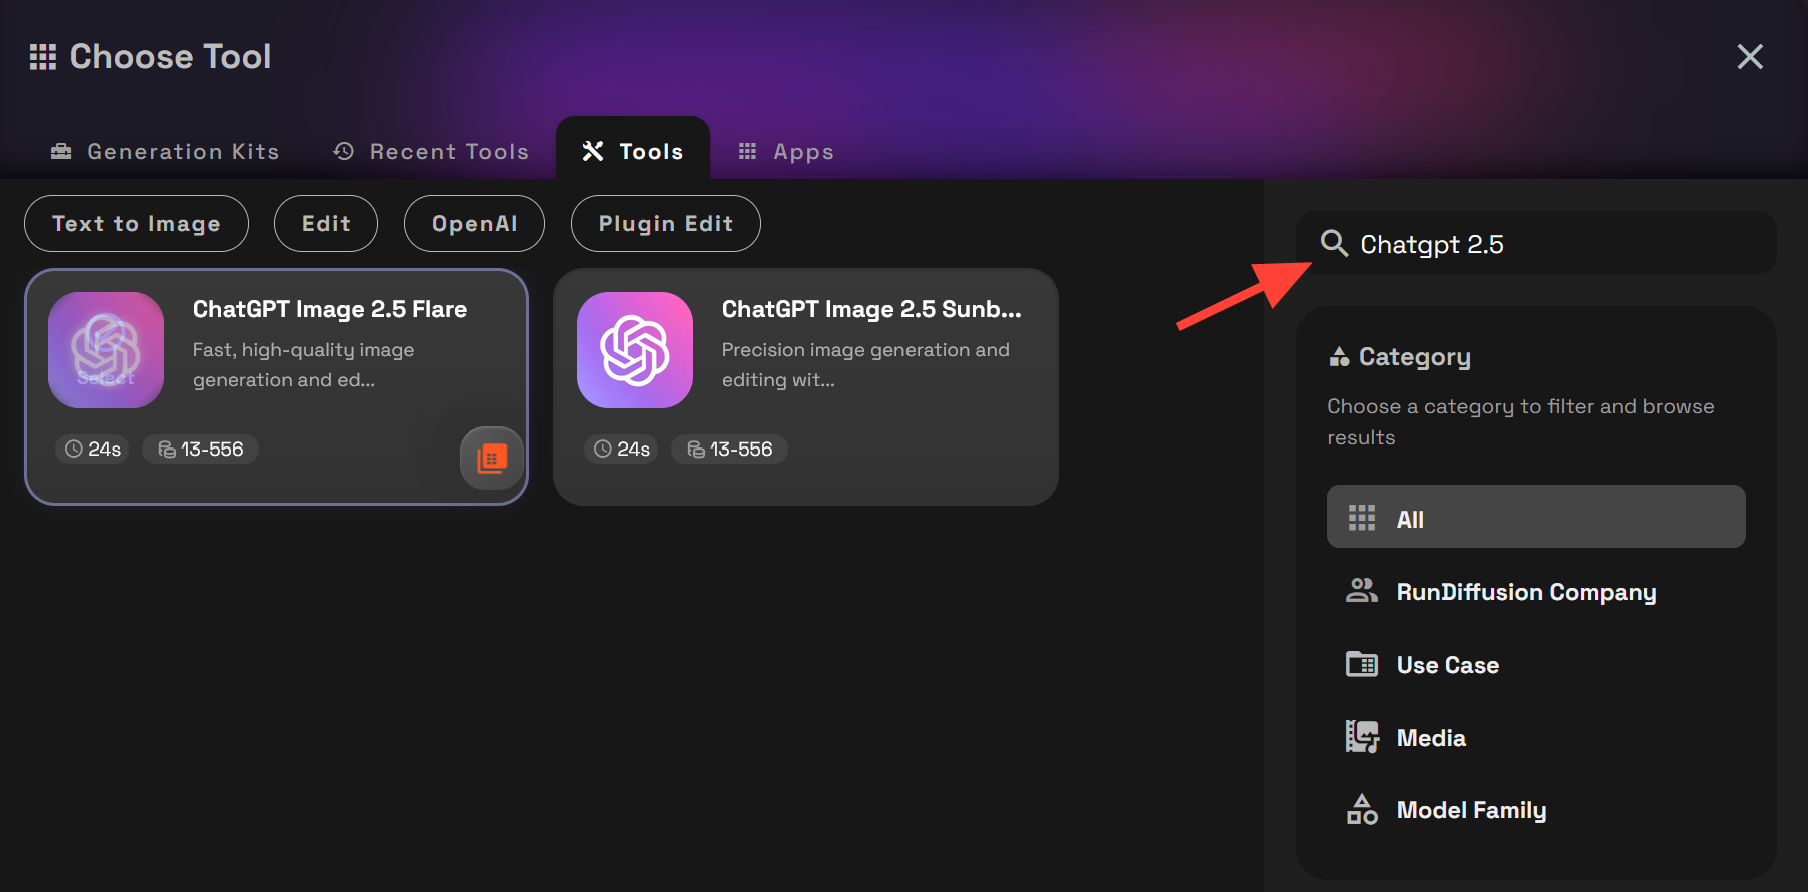
Choose Flare when speed is the priority, or Sunburst when image quality is the priority.
- Enter a Prompt and Click Run for the standard text to image.
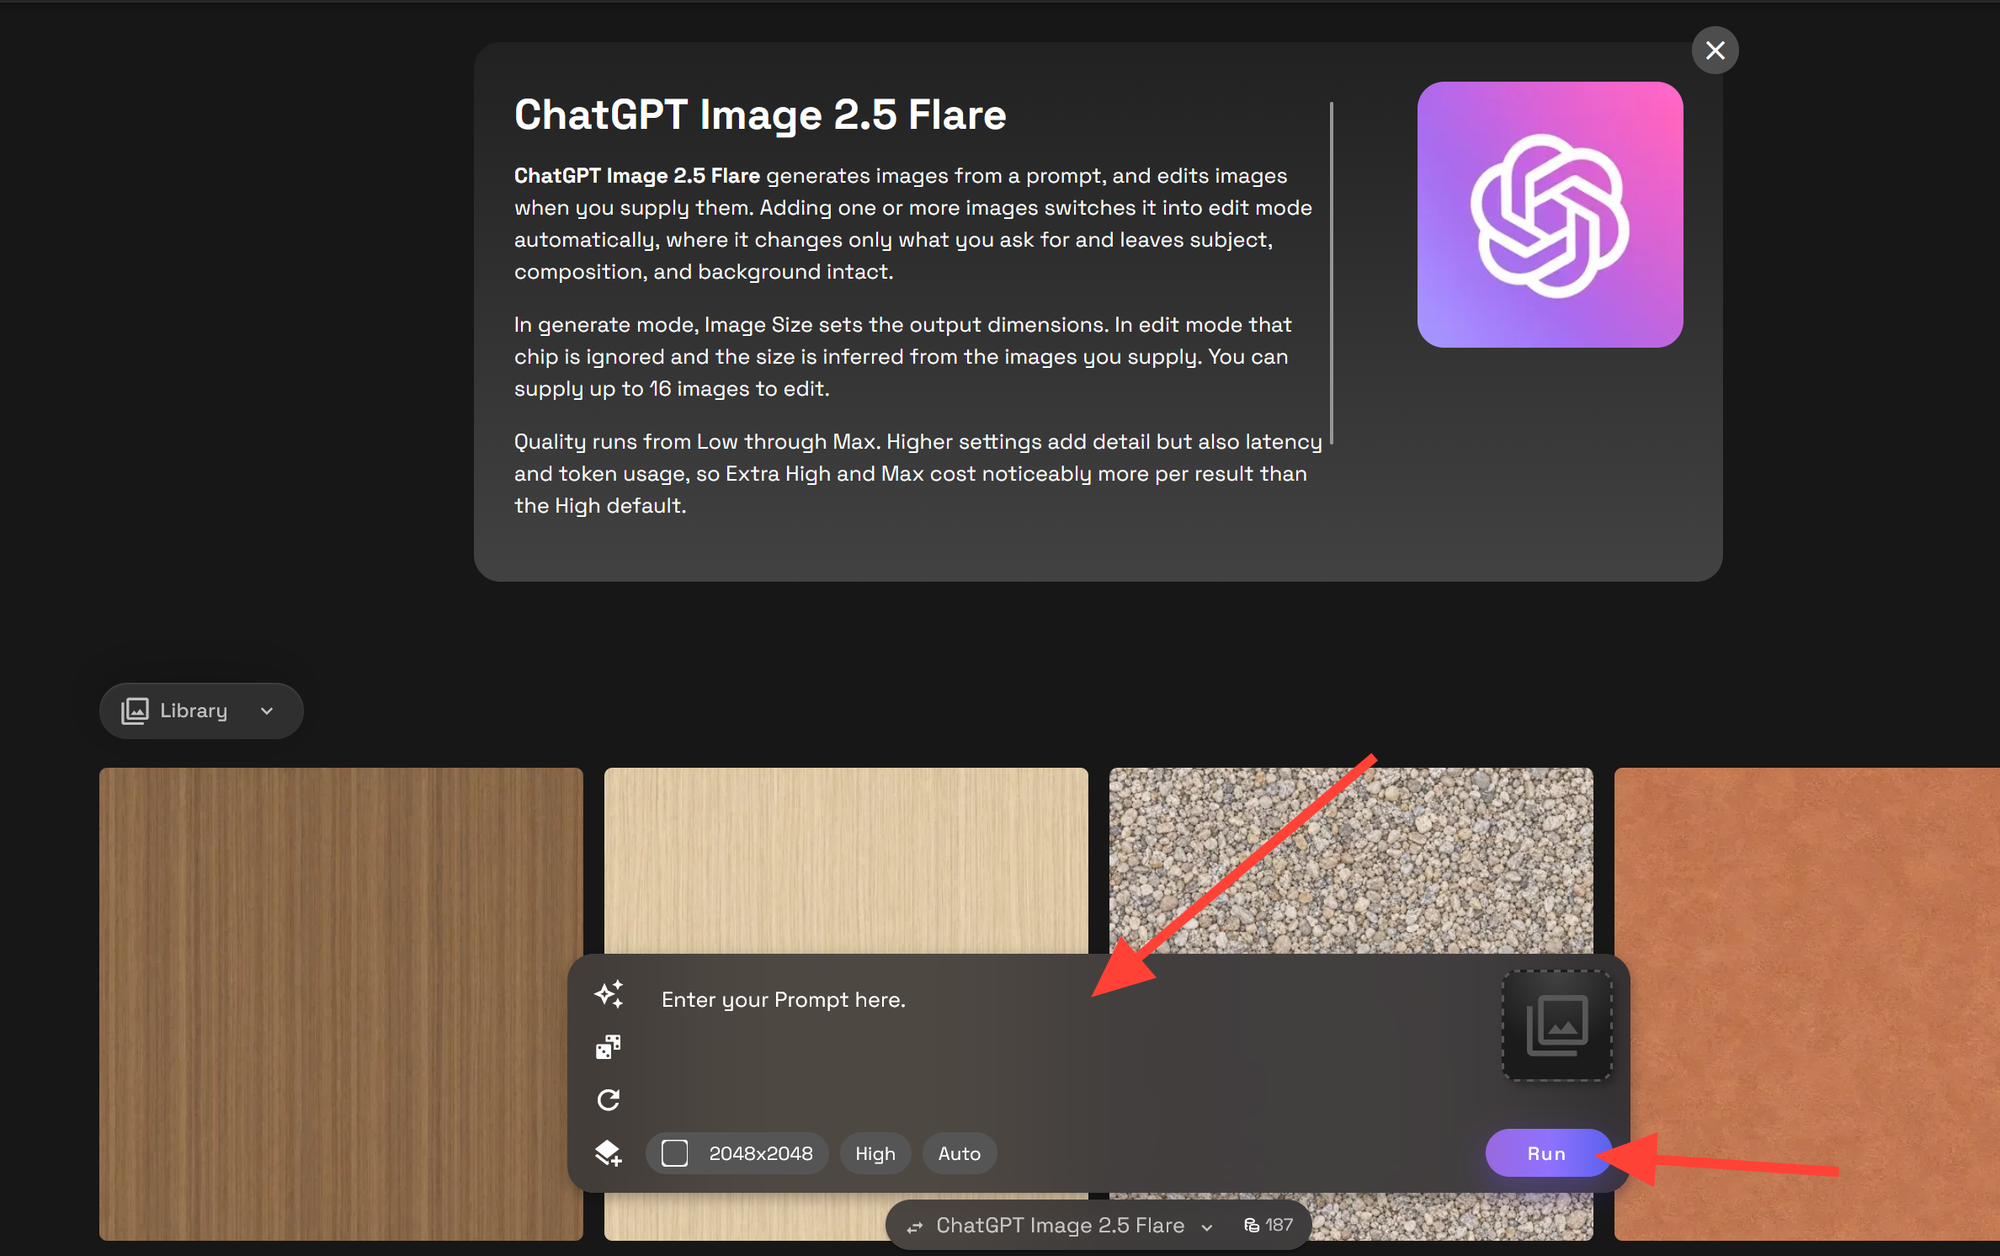
Additional Tips
For an edit, choose a photograph, sketch, Photoshop composite, render, or an image exported from SketchUp, Revit, Rhino or another design tool.
Upload the source image or drag it from your RunDiffusion library. For a new concept from text, leave the image input empty.
For text to image, choose the output dimensions. For edits, dimensions are inferred from the uploaded image.
Enter a prompt and replace the materials, objects, and locations with your project details.
Prompt structures
Text to image
Use this structure as a starting point: subject, setting, composition, materials, lighting, and constraints.
- Subject: Name the main subject and the visual style.
- Setting: Describe the setting, background, and context.
- Composition: Define subject placement, camera position, and framing.
- Materials: Assign colors, materials, and textures to specific elements.
- Lighting: Specify time of day, weather, and light direction.
- Constraints: List required features and unwanted additions.
Prompt template
Replace each bracketed placeholder with your project details and remove the brackets. The labels and colons are optional; you can also write the prompt as ordinary sentences.
Create a [photorealistic image or concept illustration] of [subject].
Setting: [background, surroundings, and context].
Layout: [subject placement and arrangement of elements].
View: [camera position, angle, and framing].
Materials: [color, texture, and surface finish].
Lighting: [time of day, weather, and light direction].
Include/Preserve [required details]. Do not add [unwanted elements, signage, or text].
Example prompt
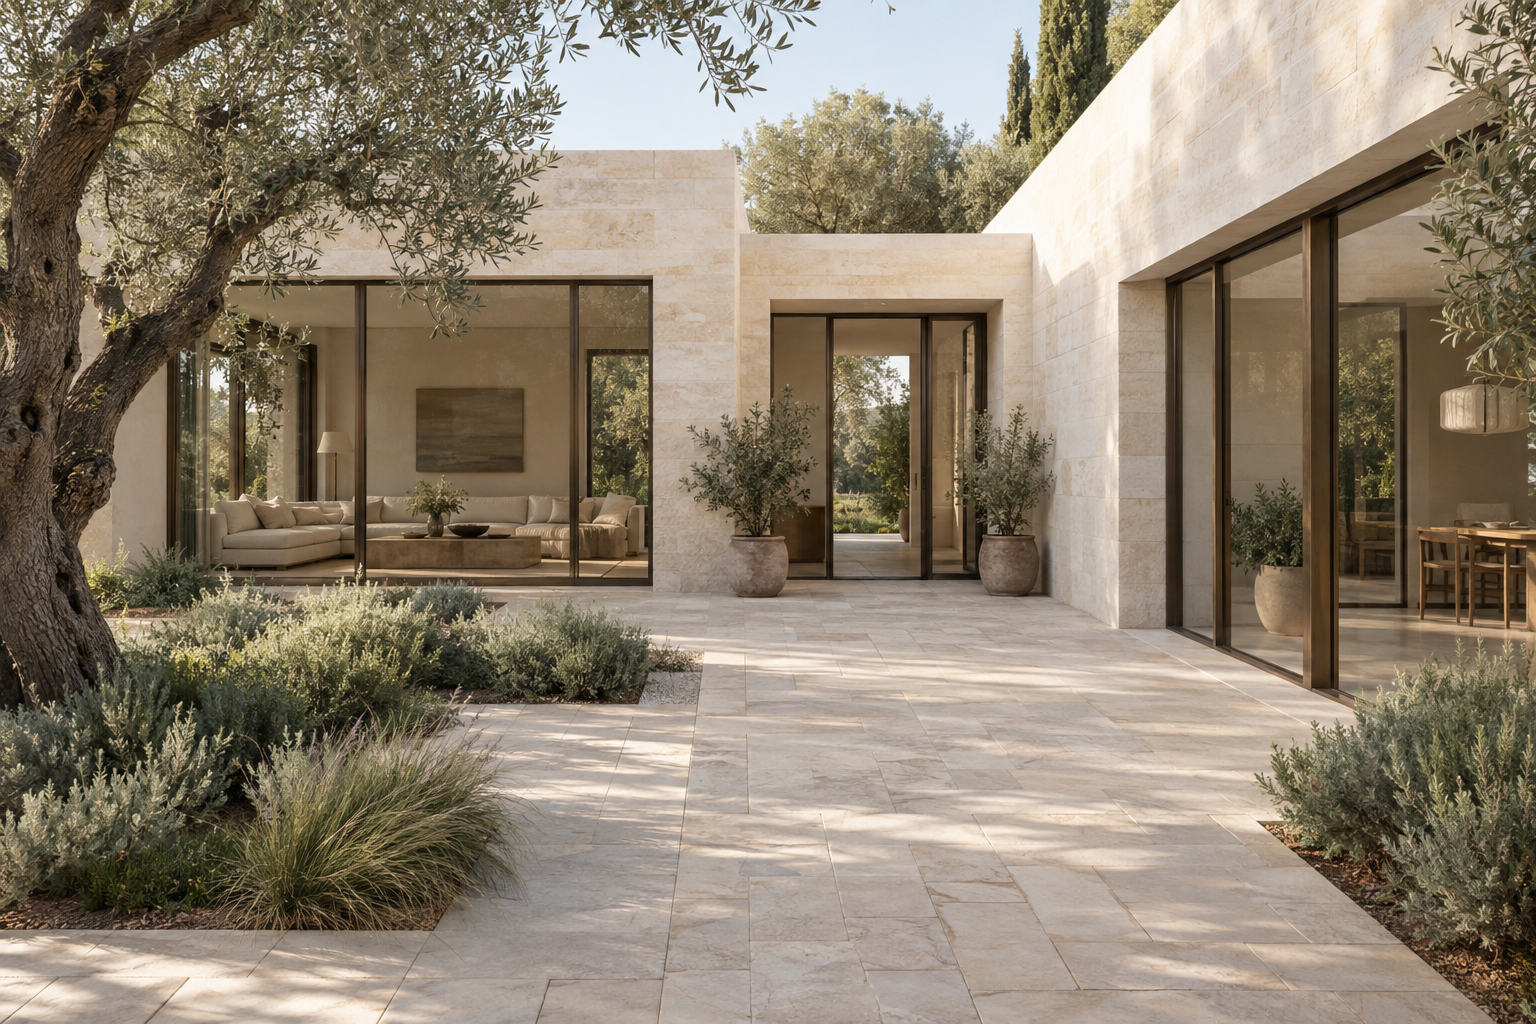
Create a photorealistic image of a single-story courtyard house in a quiet garden with olive trees and low grasses. Arrange two wings around a rectangular stone courtyard. Use an eye-level view from the courtyard, showing the entrance and a furnished living room through large windows.
Use pale limestone walls, slim bronze window frames, matte oak flooring, and cream linen upholstery. Add soft morning daylight with gentle shadows. Keep the building proportions believable and verticals straight. Do not add people, cars, signs, logos, or text.
Edit images
Use for an existing photograph, sketch, composite, render, or exported model view. Attach the source image before running the prompt.
Use this structure as a starting point: source, change, location, materials, preservation instructions, and finish.
- Source: Identify the uploaded image and what it depicts.
- Change: Name the element to replace, move, remove, or render.
- Location: Specify the target area or object position.
- Materials: Describe the desired appearance, color, material, and texture.
- Preserve: List the shapes, composition, colors, and objects to retain.
- Finish: Specify lighting, reflections, and contact shadows.
Prompt template
Replace each bracketed placeholder with your project details and remove the brackets. The labels and colons are optional; you can also write the prompt as ordinary sentences.
Edit the uploaded [photograph, sketch, composite, render, or model view].
Change only [element] at [location]. Use [appearance, material, color, texture, and scale].
Preserve [subject shape, composition, camera, crop, and surrounding objects].
Match the existing perspective.
Lighting: [retain the source lighting or specify a change]. Update reflections and contact shadows around the edit. Do not change [specific adjacent surfaces or objects].
Example prompt
Edit the uploaded living room image. Replace only the two armchairs beside the window with low walnut lounge chairs upholstered in cream boucle. Keep each chair in the same position and orientation, with approximately the same footprint as the original.
Preserve the sofa, tables, rug, walls, windows, camera position, crop, and lighting. Show the timber legs touching the floor naturally, and update shadows and reflections around the replacement chairs. Do not add furniture or change the room layout.
Two text-to-image examples
Both examples start from text alone. Leave the image input empty.
Create an architectural concept
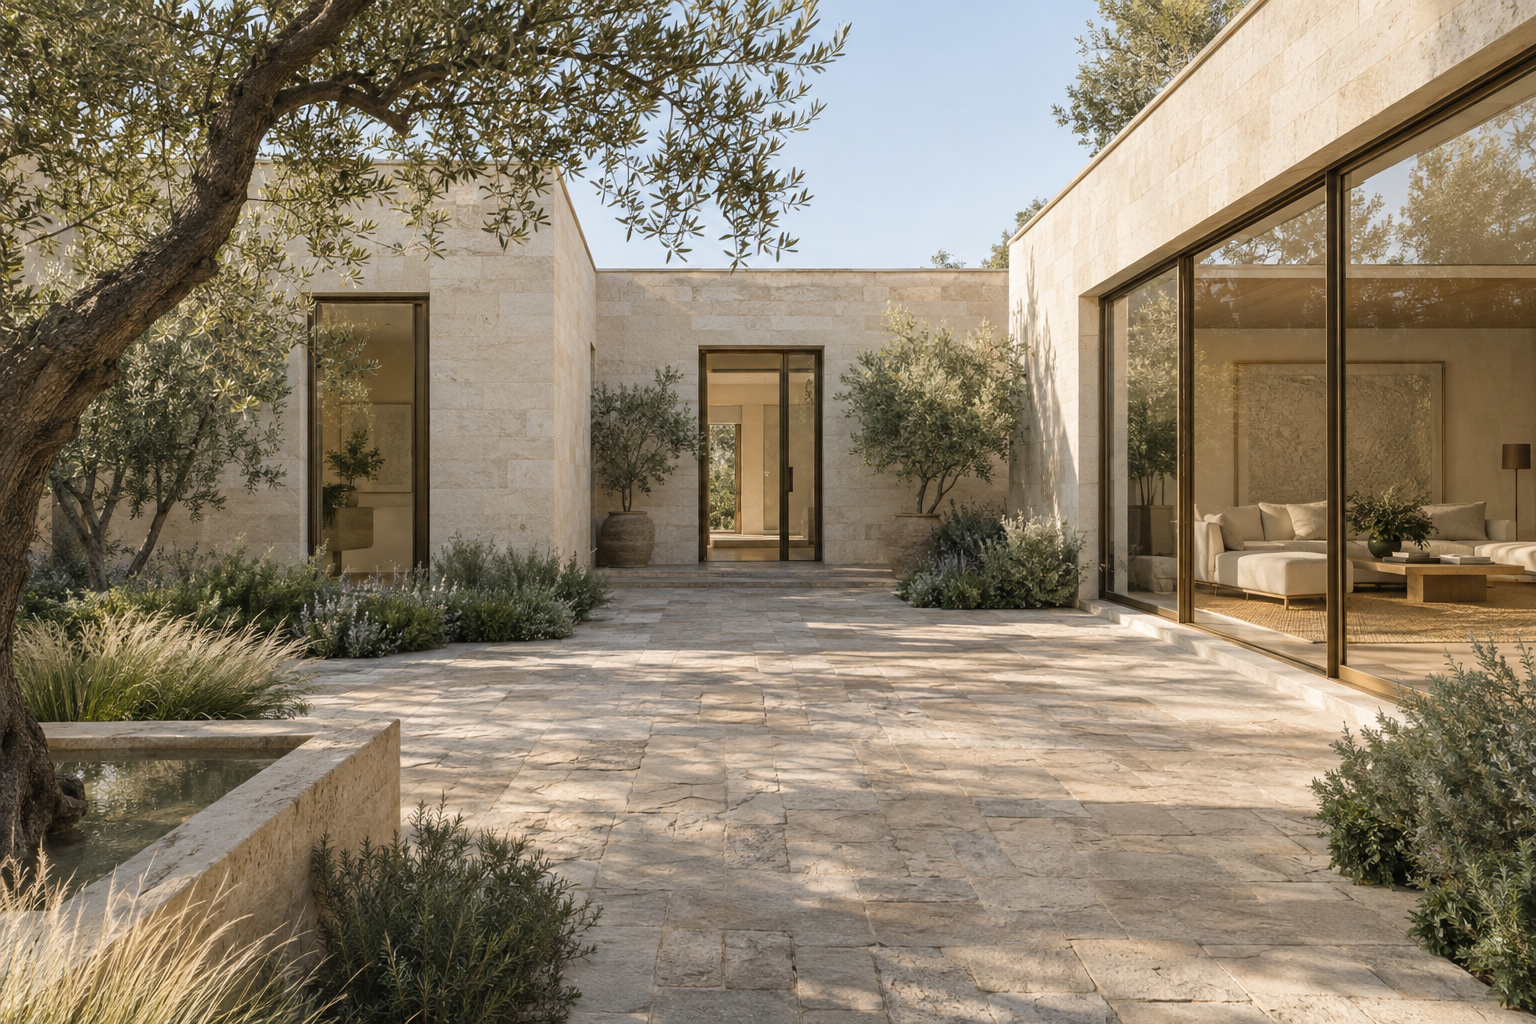
Use a scene prompt to explore form, composition, materials, and lighting before you have a source image. Select landscape dimensions; this example uses 1536 x 1024.
Example
Create a photorealistic architectural image of a single-story courtyard house.
Setting: a quiet garden with olive trees and low grasses.
Layout: two simple wings around a rectangular stone courtyard.
View: eye-level perspective from the courtyard, showing the entrance and a furnished living room through large windows.
Materials: pale limestone walls, slim bronze window frames, matte oak flooring, and cream linen upholstery.
Lighting: soft morning daylight with gentle shadows.
Keep the building proportions believable and verticals straight. Do not add people, cars, signs, logos, or text.
Create a material texture
Generate surface swatches for mood boards, Photoshop composites, or material studies. Select square dimensions; this example uses 1024 x 1024.
Example
Create a square limestone surface texture for an architectural material study.
View: straight-on, with the surface filling the entire image.
Material: warm ivory honed limestone with fine pores, subtle fossil flecks, and gentle tonal variation at a consistent scale.
Lighting: flat, diffuse, and even across the surface.
Show one continuous surface, without slab edges or grout lines. Avoid strong veins, stains, cracks, shadows, highlights, vignetting, perspective, objects, labels, and text. Keep the pattern evenly distributed for use as a texture swatch.
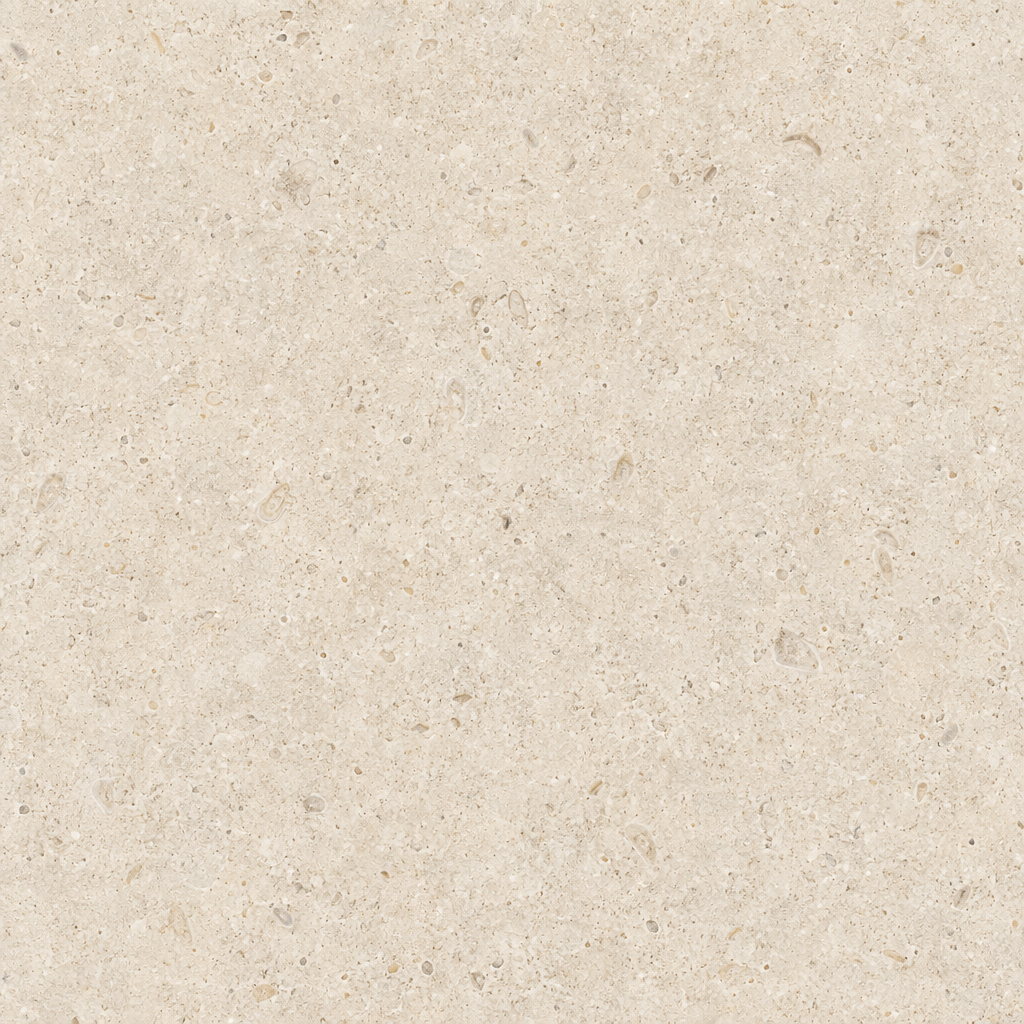
For texture prompts, specify a straight-on view, even lighting, and no visible surface edges. Check seams before repeating the image across a surface; this swatch is not a verified seamless tile or a complete 3D material.
Eight editing examples: architecture, interiors, and landscapes
1. Model view to architectural render
Input: An exterior perspective exported as an image from SketchUp, Revit, or another modeling tool.
Example
Turn the uploaded model view into a photorealistic exterior.
Preserve the building outline, floor count, roof shape, window positions, columns, balconies, and entrance. Keep the original camera, perspective, and crop.
Apply pale limestone panels to the solid facade surfaces, dark bronze frames to the windows, and clear glazing. Use fine recessed panel joints and subtle stone variation. Finish the ground in dry, light gray concrete paving.
Add soft overcast daylight and realistic glass reflections. Keep the ground levels and neighboring building outlines. Do not add floors, openings, canopies, decorative screens, planting, or wet surfaces.
2. Change a facade material
Input: An exterior with upper-floor timber cladding.
Example
Replace only the upper-floor timber cladding with muted terracotta panels and fine vertical joints.
Preserve the facade depth, building silhouette, floor heights, window sizes, and window positions. Keep balcony edges, the ground-floor finish, and the roof material unchanged.
Maintain the camera, crop, daylight, sky, and landscaping. Match the panel texture scale to the building. Do not add fins, screens, or openings.
Generate each material option from the same source image.
3. Change interior finishes
Input: A room photograph or interior model view.
Example
Edit the uploaded interior image. Change only the floor and the wall behind the sofa.
Replace the floor with wide matte oak boards. Run the long edges from the left wall toward the windows on the right, parallel to the front edge of the sofa. Do not run the boards from the camera toward the sofa. Finish the wall behind the sofa in warm ivory limewash with subtle texture and no visible panel joints.
Preserve the room dimensions, ceiling, doors, windows, skirting profiles, furniture, rug, and camera position. Keep the lighting direction and exposure. Update reflections and contact shadows for the new finishes.
4. Replace furniture
Input: An interior with two armchairs beside a window.
Example
Replace only the two armchairs beside the window with low walnut lounge chairs upholstered in cream boucle.
Keep each chair in the same position and orientation, with approximately the same footprint as the original. Show the timber legs touching the floor naturally.
Preserve the sofa, tables, rug, walls, windows, camera position, crop, and lighting. Update shadows and reflections around the replacement chairs. Do not add furniture or change the room layout.
5. Rearrange a seating area
Input: A lounge with a sofa, coffee table, and two armchairs.
Example
Rearrange only the two armchairs in the uploaded lounge.
Keep the sofa and coffee table in place. Move both armchairs to the foreground, on the camera side of the coffee table. Place them side by side, facing directly toward the sofa. Show the backs of both chairs to the camera. The coffee table must sit between the chairs and the sofa. Do not place the chairs at the left and right ends of the table. Keep a clear walking route beside the seating group.
Retain exactly two chairs with the same navy upholstery, furniture designs, and sizes. Preserve the rug, room geometry, finishes, doors, windows, camera, crop, and lighting direction. Reconstruct the floor where the chairs previously stood. Update contact shadows. Do not add or duplicate furniture.
6. Change paving and planting
Input: A landscape view with an entrance path and planting beds.
Example
Edit only the entrance path finish and its planting beds.
Replace the paving with warm gray rectangular stone slabs laid across the path. Retain the path width and alignment. Replace the planting within the existing beds with low grasses and compact shrubs.
Preserve the bed boundaries, mature trees, site levels, steps, drainage channels, building, and entrance. Keep the camera, crop, and lighting unchanged.
Keep the walking route and doorway clear. Do not add trees, steps, water features, or retaining walls.
7. Remove an object
Input: An exterior with a parked car obscuring the facade.
Example
Remove only the parked car in front of the building.
Reconstruct the paving and background behind it, continuing visible joints, edges, and surface textures. Remove the car's shadow and its reflections in nearby glass.
Preserve the building, entrance, planting, street furniture, camera position, crop, and daylight. Do not replace the car with another object.
8. Change daylight to evening
Input: An approved daylight exterior.
Example
Change the uploaded exterior to an early-evening view.
Preserve the geometry, openings, material assignments, camera position, crop, furniture, and landscaping. Let brightness and reflections respond to evening light.
Use a blue-hour sky, warm light inside existing glazed rooms, and discreet entrance lighting. Keep facade textures visible in the remaining daylight.
Do not add windows, decorative light strips, or dramatic spotlights.
Best practices
- Use a clean source. Use a clear photograph, sketch, composite, or exported view without menus, selection highlights, or unnecessary annotations.
- Name the exact target. Write “the wall behind the sofa” or “upper-floor timber cladding” instead of “change the materials.”
- Keep the scope narrow. Separate a furniture rearrangement from a lighting or facade study.
- Assign reference roles. If multiple inputs are supported: “Image 1 defines the room. Image 2 supplies only the chair design.”
- Separate edits from fixed elements. Preserve the camera and geometry while allowing shadows and reflections to change around a moved object.
- Reuse the right source. Use the latest approved output for sequential edits; use the same original for competing design options.
- Inspect the whole result. Check openings, floor heights, furniture counts, and unchanged surfaces. Preservation instructions do not lock geometry.
- Set size in the tool. For text to image, choose dimensions in the tool. For edits, dimensions follow the source image. Writing “4K” in the prompt does not set the resolution.
Verify dimensions and technical requirements in your drawings and models. Explore more architecture workflows on RunDiffusion.