

RunDiffusion for Miro connects your RunDiffusion workspace to the board where your team organizes and reviews visual work. Browse existing generations, create AI images, and place them on the canvas from a docked panel.
This guide explains how to install the RunDiffusion Miro plugin, connect a personal or team account, add library images to a board, generate new visuals, send Miro images to Uploads, and reuse those images in image-to-image workflows.
Quick Answers
- Installation. Start in RunDiffusion under Plugins & APIs, then complete the installation through Miro.
- Connection. Sign in from the plugin, verify the device code, allow the connection, and select the RunDiffusion account to use.
- Library access. Browse the active account's library and drag images directly onto the Miro board.
- AI image generation. Create images from the Generate tab; completed results appear on the board and in the RunDiffusion library.
- Two-way image workflow. Send selected board images to Uploads or use them as Image to Image inputs for another generation.
- Revit-to-Miro reviews. Generate a concept from a Revit view, then bring it into Miro through the selected RunDiffusion workspace library.
What you can do with RunDiffusion for Miro
- Library access. Browse images from the active personal or team account.
- Board placement. Drag a library image directly onto the Miro canvas.
- AI image generation. Run supported generation tools from the plugin panel.
- Uploads. Send a selected Miro image to the RunDiffusion Uploads library.
- Image-to-image input. Use a selected board image as the reference for a new generation.
- Revit-to-Miro reviews. Move a concept from RunDiffusion for Revit into a Miro review board through the selected workspace library.
Why use RunDiffusion for image generation in Miro?
The plugin connects a Miro board to the images and generation tools in your RunDiffusion workspace. Start with an existing library image, create a missing option during a review, or send a selected board image back when it should guide the next generation.
This two-way workflow keeps existing assets, generated alternatives, and review feedback connected to the same project context.
Requirements
- A RunDiffusion account.
- A Miro board.
- Permission to install or open apps in the Miro team or workspace.
Generation uses credits from the RunDiffusion personal or team account selected after authorization.
Install the RunDiffusion Miro plugin
Installation step 1: Log in to RunDiffusion
Open RunDiffusion and select Log in from the upper-right corner. Use the RunDiffusion account you intend to connect to Miro.

Installation step 2: Open Plugins & APIs
Select Plugins & APIs in the left sidebar of the RunDiffusion platform.

Installation step 3: Select Get Started for Miro
Locate the Miro integration and select Get Started.

Installation step 4: Select Get it on Miro
Review the beta/pre-release notice and select Get it on Miro. Complete the Miro installation prompts for the team or workspace where the plugin will be used.


Connect RunDiffusion to Miro
Step 1: Open RunDiffusion for Miro
Open the tools and apps panel on the left side of the Miro board. Search for RunDiffusion if necessary, then select RunDiffusion for Miro.

Step 2: Select Sign in
Select Sign in from the RunDiffusion panel. A browser authorization page opens and the plugin displays a temporary device code.

Step 3: Verify the device code
Confirm that the code in the Miro plugin matches the code on the RunDiffusion authorization page.

Step 4: Allow the connection
If the codes match, select Allow. If they do not match, cancel the request and restart sign-in from the Miro plugin.

Step 5: Return to Miro
After RunDiffusion confirms the connection, return to the Miro board. The plugin will display the available RunDiffusion accounts.

Step 6: Select the RunDiffusion account
Select the personal or team account to use. That account supplies generation credits and determines which library appears in the plugin. Select Switch at the top of the panel to change accounts.

Add a RunDiffusion library image to Miro
Step 7: Open Library
Open Library to view images from the active RunDiffusion account. Use the available filters or scroll through the results.

Step 8: Drag the image onto the board
Drag an image thumbnail from Library onto the Miro canvas. The image can then be moved, resized, or placed inside a Miro frame.

Generate AI images in Miro
Made with RunDiffusion
Compare façade materials
Select a pavilion image on the board and explore a terracotta alternative to its limestone cladding.
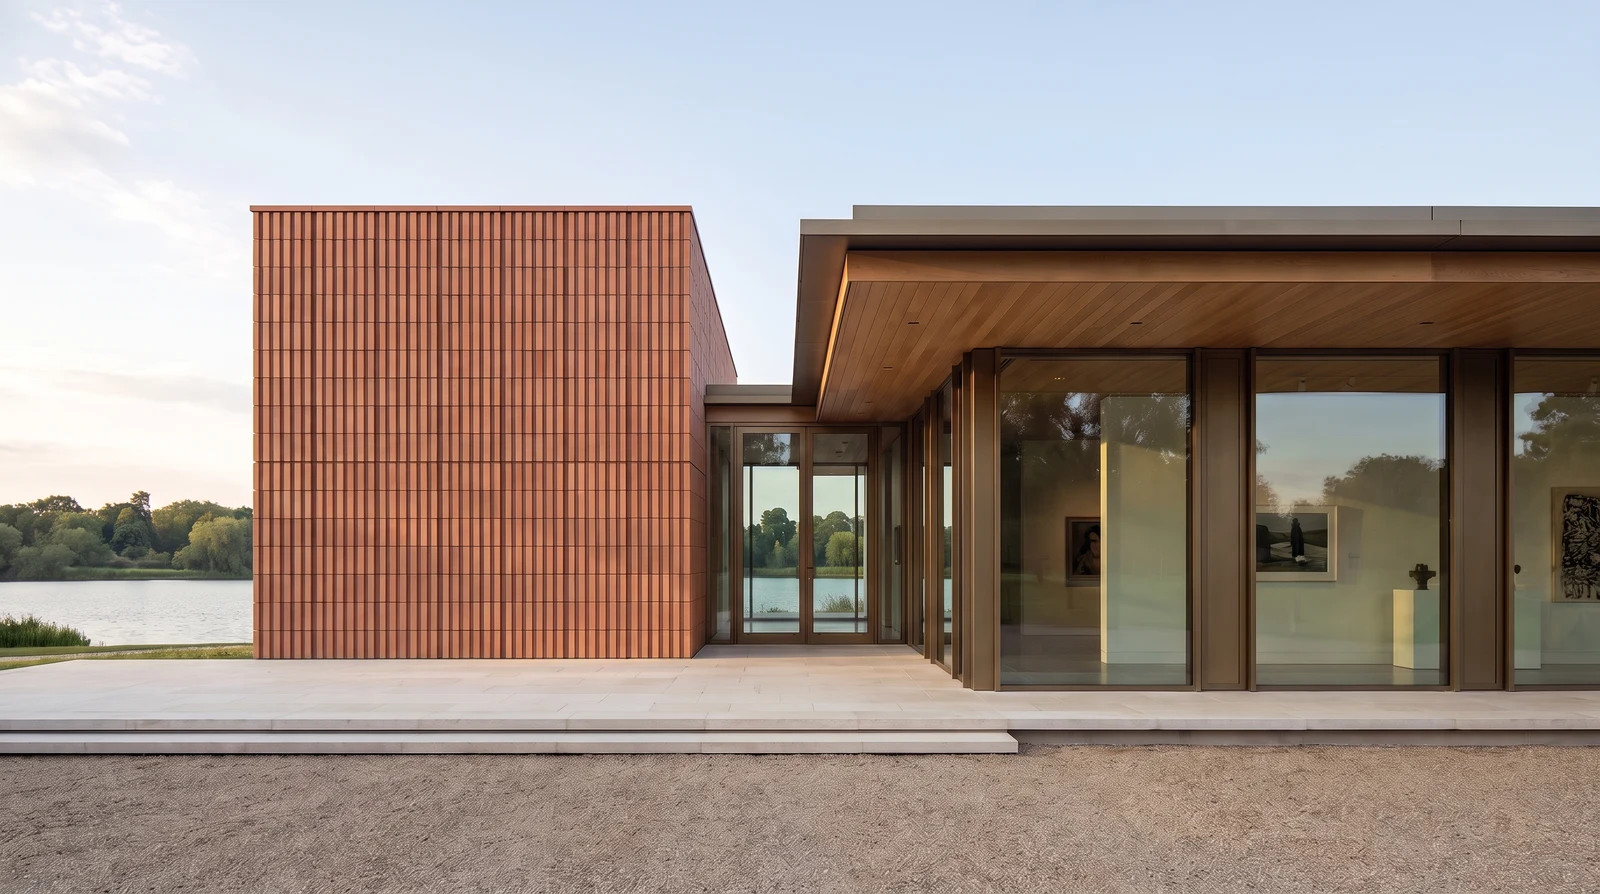
Made with RunDiffusion
Explore landscape and context
Develop a gravel forecourt into a planted arrival garden, with a stone path, ornamental grasses and a birch tree.
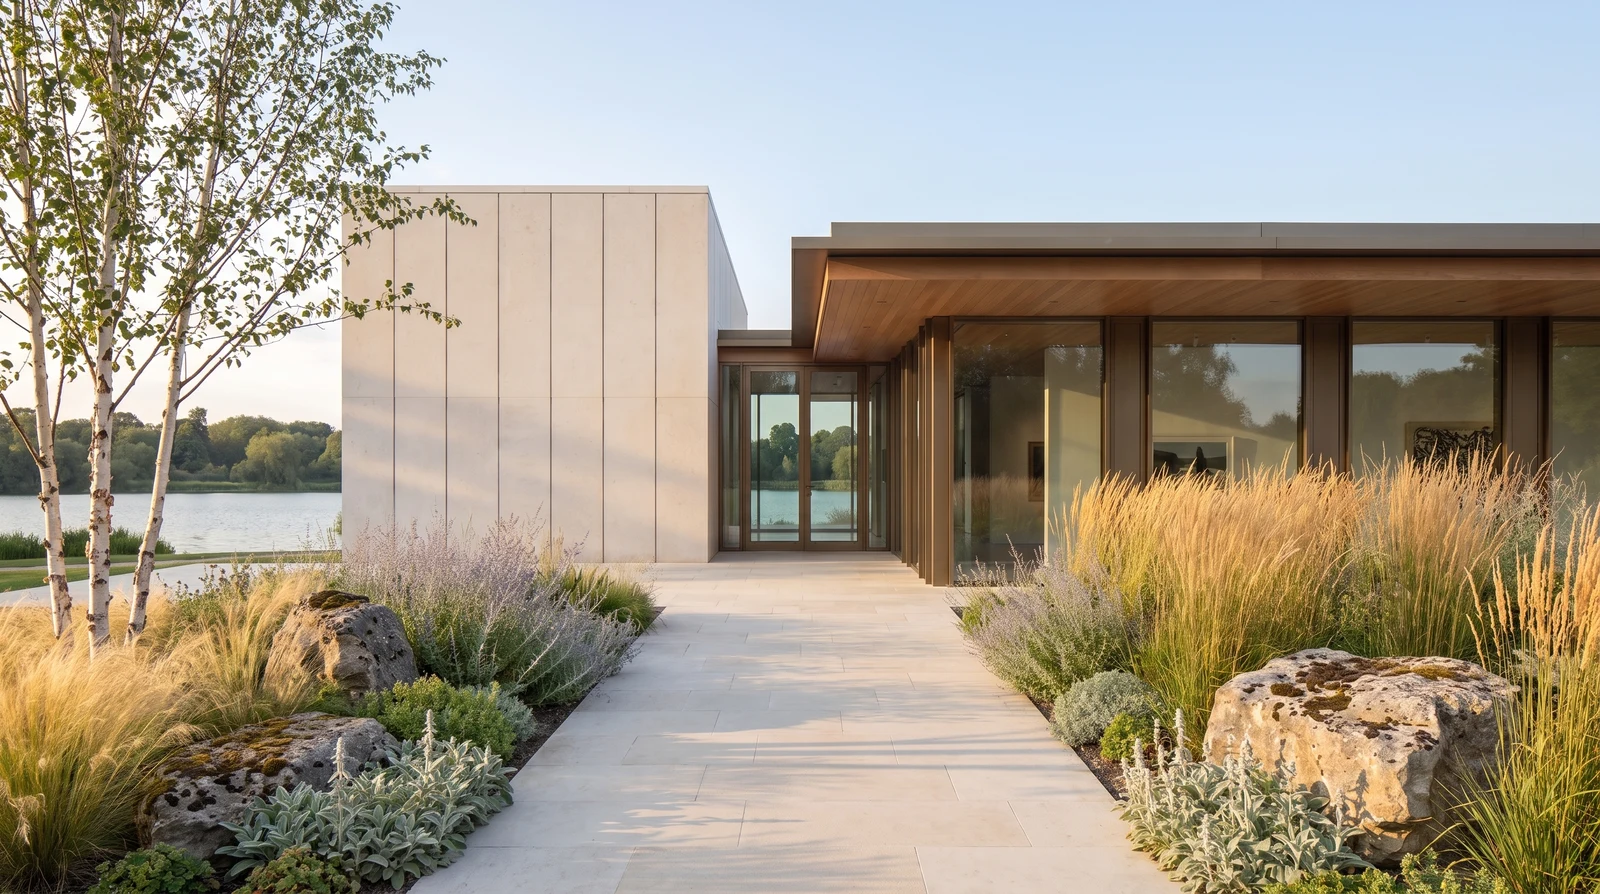
Made with RunDiffusion
Revise an interior finish
Use the lounge image as a reference to explore burnt-sienna velvet in place of ivory bouclé on the curved sofa.
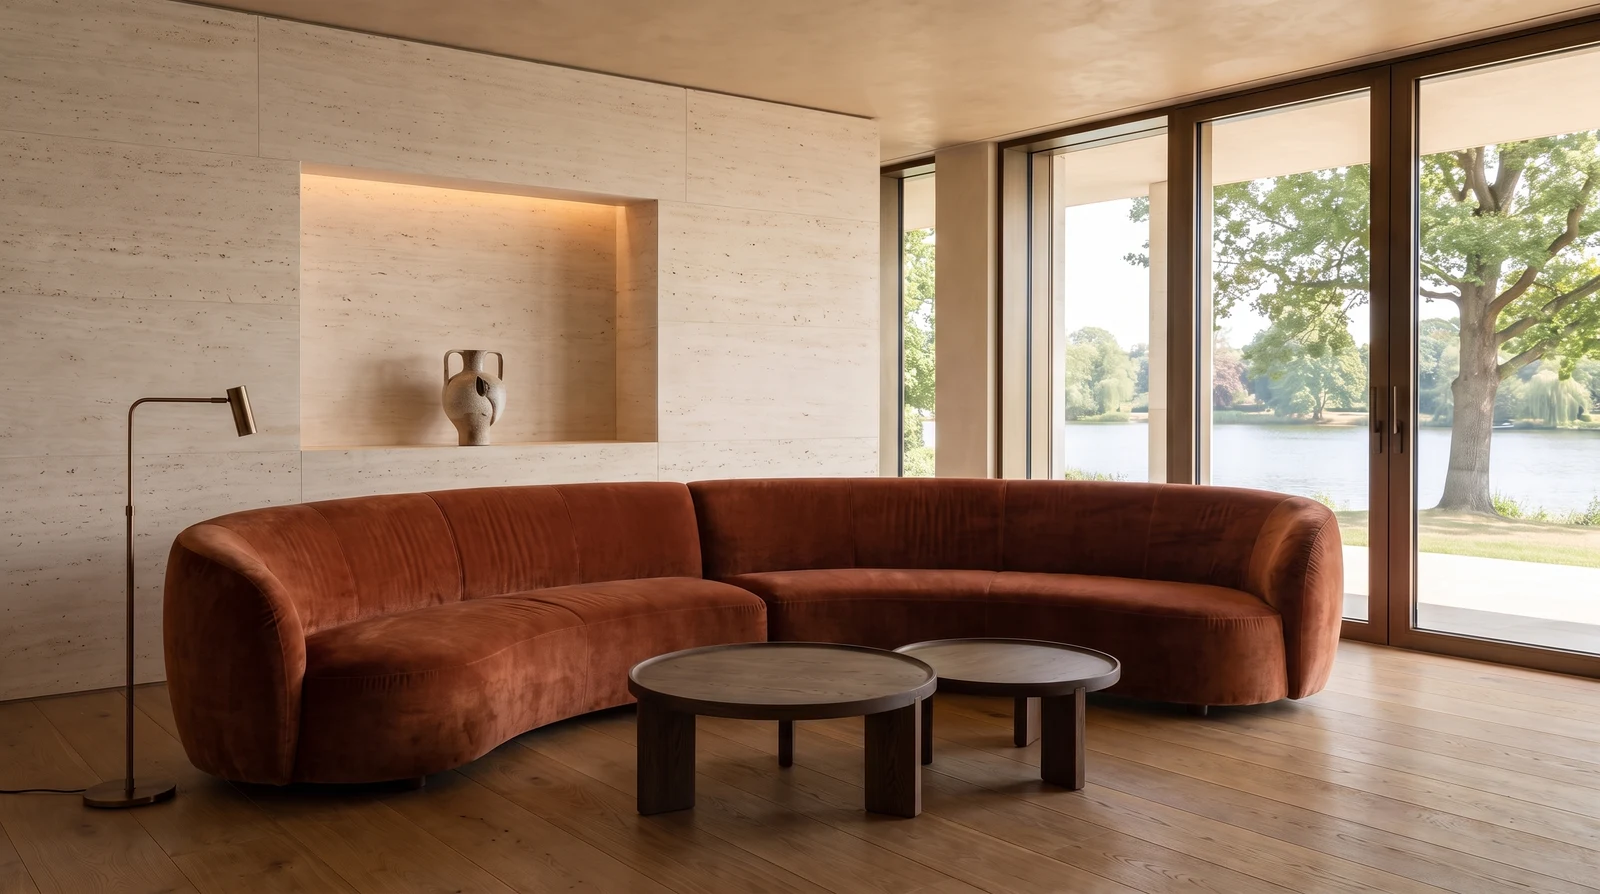
Step 9: Configure the generation
Open Generate, select a RunDiffusion tool, and enter the prompt. Complete the controls available for that tool, then select Generate.
For text-to-image generation, leave Image to Image empty. To use a reference, add an image from the board or the RunDiffusion library.

Step 10: Review the result
The completed image is placed on the Miro board and added to the RunDiffusion library. Move or resize it as required.

Send a Miro image to RunDiffusion
Step 11: Select the image and open Send
Select the image on the Miro canvas and open Send. Confirm the thumbnail in the plugin, then select Send 1 image to RunDiffusion.

Step 12: Find the image in Uploads
Open Library, then select Uploads. The image sent from Miro appears in the Uploads library for the active RunDiffusion account.

Use a Miro image as generation input
Step 13: Add the selected image to Image to Image
Select an image on the board and open Generate. The selected image appears in the Image to Image area. You can also choose an existing reference from Library. Enter the prompt for the new result.

Step 14: Generate the new result
Select Generate. The new image appears on the board and in the RunDiffusion library.

Use Revit concepts in Miro architectural reviews
RunDiffusion for Miro also connects with RunDiffusion for Revit through the selected workspace library. Generate a concept from a Revit view, then open the same RunDiffusion account in Miro and drag the result onto the board.
- Generate from a Revit view. Create a visual concept from the project view with RunDiffusion for Revit.
- Open the same workspace in Miro. Select the RunDiffusion account that contains the generated image.
- Review and refine. Drag the concept onto the board, compare it with other directions, and use a selected image as input for the next iteration.
This Revit-to-Miro workflow gives architecture teams a direct path from a BIM view to a collaborative design review without manually downloading and re-uploading the generated result.
Troubleshooting
RunDiffusion is not available in the Miro tools panel
Confirm that the app is installed in the current Miro team or workspace.
The device codes do not match
Do not approve the request. Cancel it, return to the Miro plugin, and start sign-in again to generate a new code.
The expected library is not displayed
Check the active account at the top of the plugin. Select Switch and choose the personal or team account that contains the required images.
The selected image does not appear in Send
Select the image element directly on the Miro canvas, reopen Send, and confirm its thumbnail before sending.
Frequently Asked Questions
How do I install the RunDiffusion Miro plugin?
Log in to RunDiffusion, open Plugins & APIs, select Get Started for Miro, and then select Get it on Miro. Complete the Miro installation prompts.
How do I connect RunDiffusion to Miro?
Open RunDiffusion for Miro from the Miro tools panel and select Sign in. Confirm that the device code in Miro matches the browser code, select Allow, return to Miro, and choose the RunDiffusion account to use.
Can I use my RunDiffusion library images in Miro?
Yes. Open Library in the plugin and drag an image thumbnail onto the Miro canvas. The image can then be moved, resized, or placed inside a Miro frame.
Can I generate images directly from a Miro board?
Yes. Open Generate, select a RunDiffusion tool, enter the prompt, complete the available controls, and select Generate. The result is added to the board and the RunDiffusion library.
Can I send a Miro image to RunDiffusion?
Yes. Select the image on the board, open Send, confirm the thumbnail, and send it to RunDiffusion. The image appears in the Uploads library for the active account.
Can I use a Miro image as an image-to-image input?
Yes. Select an image on the board and open Generate. The selected image appears in the Image to Image area, where it can be used as the reference for a new result.
Which RunDiffusion account does the Miro plugin use?
The plugin uses the personal or team account selected after sign-in. That account supplies generation credits and determines which library is available. Select Switch to change accounts.
Can I move a Revit concept into a Miro review board?
Yes. Generate the concept with RunDiffusion for Revit, open the same account in Miro, and drag the result from the workspace library onto the board.
Install RunDiffusion for Miro
Install the plugin through Miro, connect the personal or team account you want to use, and follow the steps above to browse, generate, send, and reuse images from the board.
Explore the RunDiffusion plugin collection to see how the same account, workspace library, and credits connect Miro, Revit, and Photoshop.