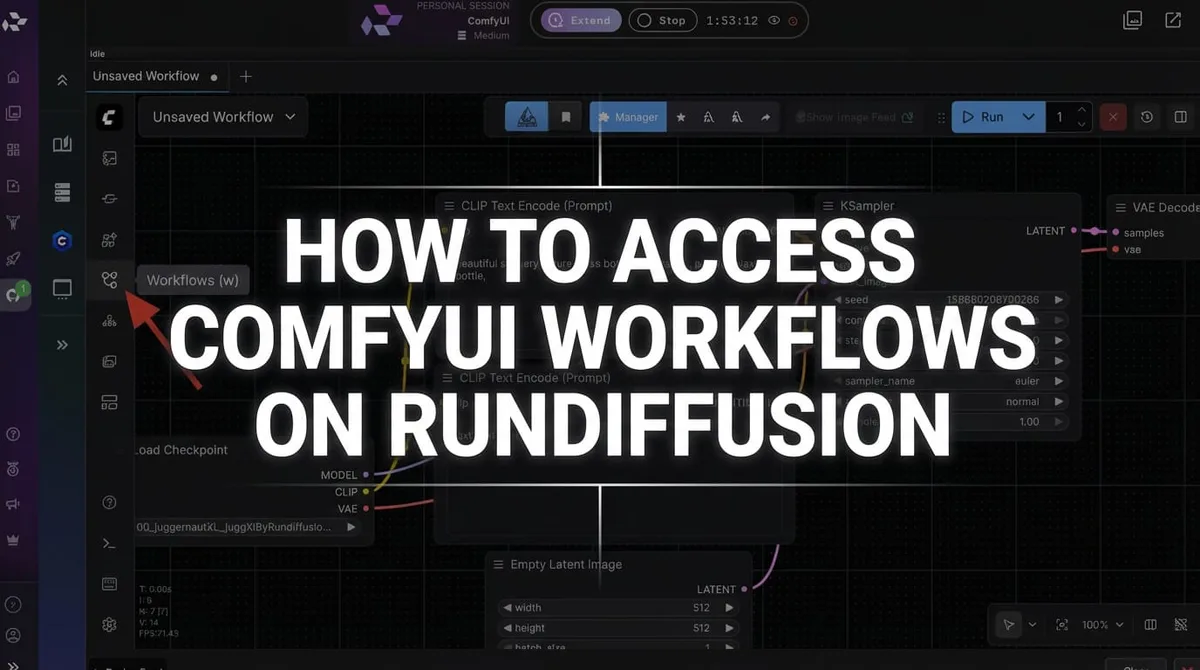
- RunDiffusion lets you launch ComfyUI in the cloud from the Opensource Applications section.
- The Juggernaut Z workflow JSON gives you a starting ComfyUI graph for text-to-image and image-to-image work.
- If ComfyUI reports missing nodes, use Manager to install the missing custom nodes and then restart the ComfyUI app.
- Start with a normal square, portrait, or landscape resolution before changing advanced workflow nodes.
To use Juggernaut Z inside ComfyUI on RunDiffusion, launch ComfyUI from Opensource Applications, load the Juggernaut Z workflow JSON, install missing RES4LFY nodes through Manager if prompted, restart ComfyUI, set a resolution, write a prompt, and click Run.
| At a glance | |
|---|---|
| Model | Juggernaut Z |
| Host app | ComfyUI on RunDiffusion |
| Workflow files | Text-to-image and image-to-image JSON workflows |
| Missing node shown in the guide | RES4LFY |
| Starting resolutions | 1024 x 1024, 832 x 1216, 1216 x 832 |
Main Article Body
Juggernaut Z is a powerful image generation model for creating polished, detailed images inside ComfyUI. In this quick guide, you'll learn how to launch ComfyUI on RunDiffusion, load the Juggernaut Z workflow JSON, choose your resolution, type a prompt, and click Run.
ComfyUI is available through RunDiffusion as an opensource application. After you log in, you'll start from RunDiffusion's Runnit Platform and open ComfyUI from the Opensource Applications section.
For more background on the model, visit the Juggernaut Z landing page. For prompt structure, style ideas, and better output control, use the Juggernaut Z prompt guide.
Additional workflows were added June 4, 2026. You may open these inside ComfyUI on RunDiffusion.
- Juggernaut Z text-to-image annotated workflow JSON
- Juggernaut Z image-to-image annotated workflow JSON
Step-by-Step: Use Juggernaut Z in ComfyUI
- Log in to RunDiffusion.
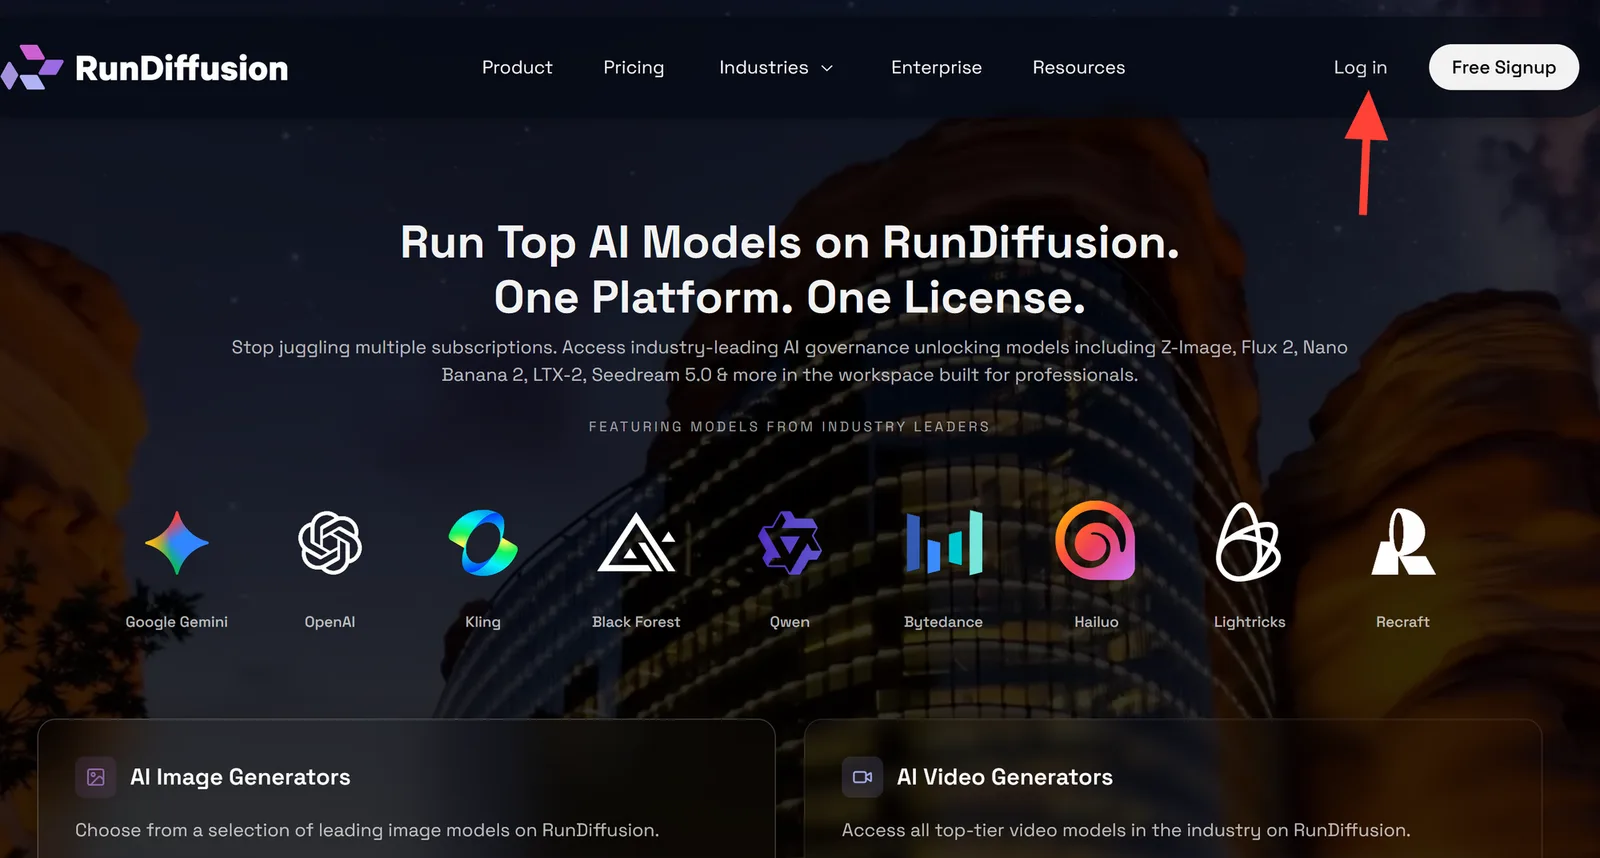
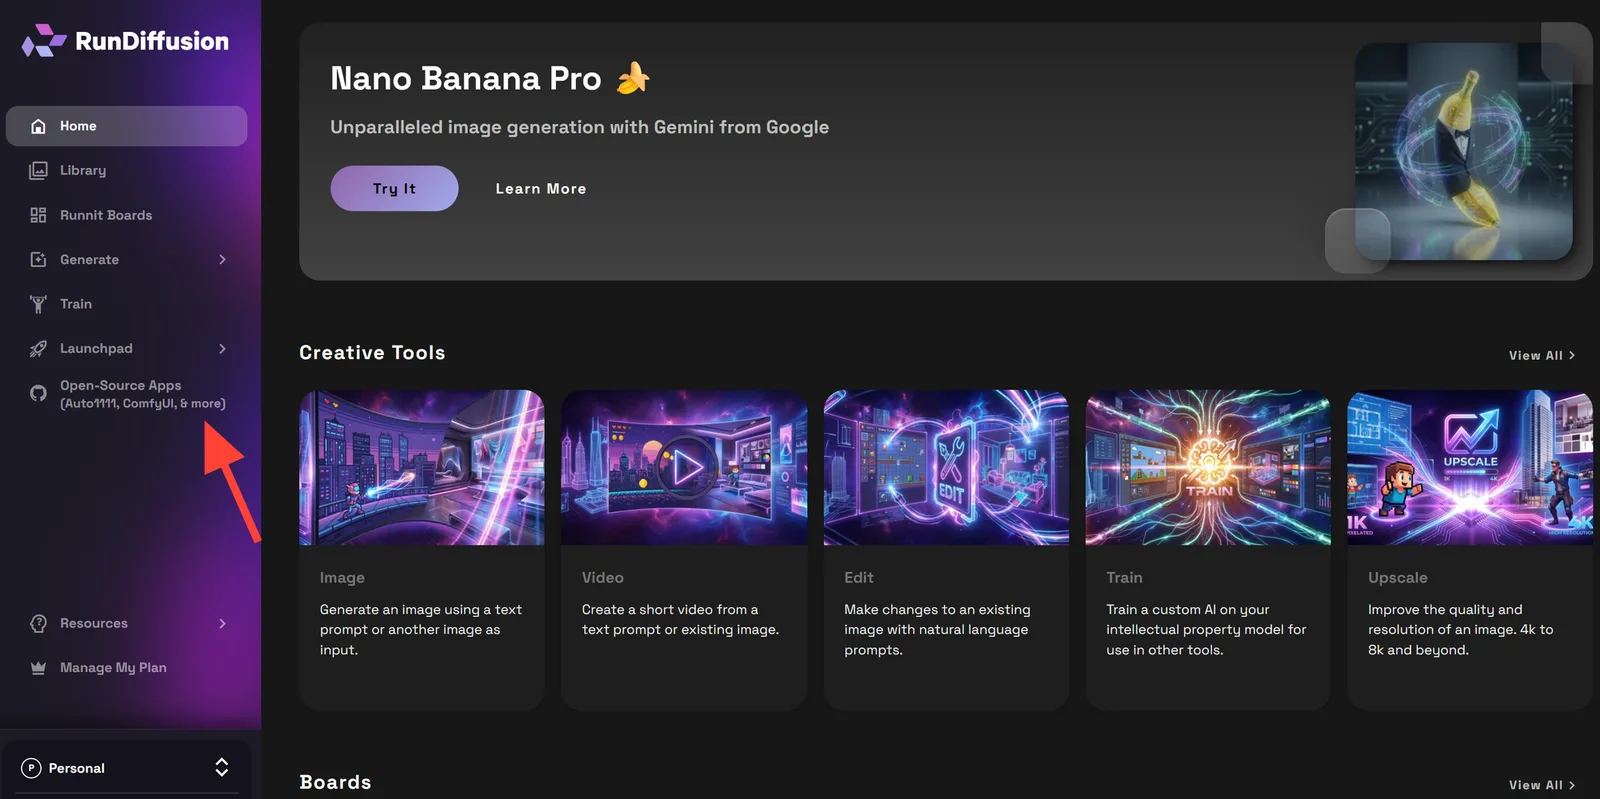
- After login, you are automatically redirected to RunDiffusion's Runnit Platform. In the left sidebar, click Opensource Applications.
- First choose ComfyUI and click Select.
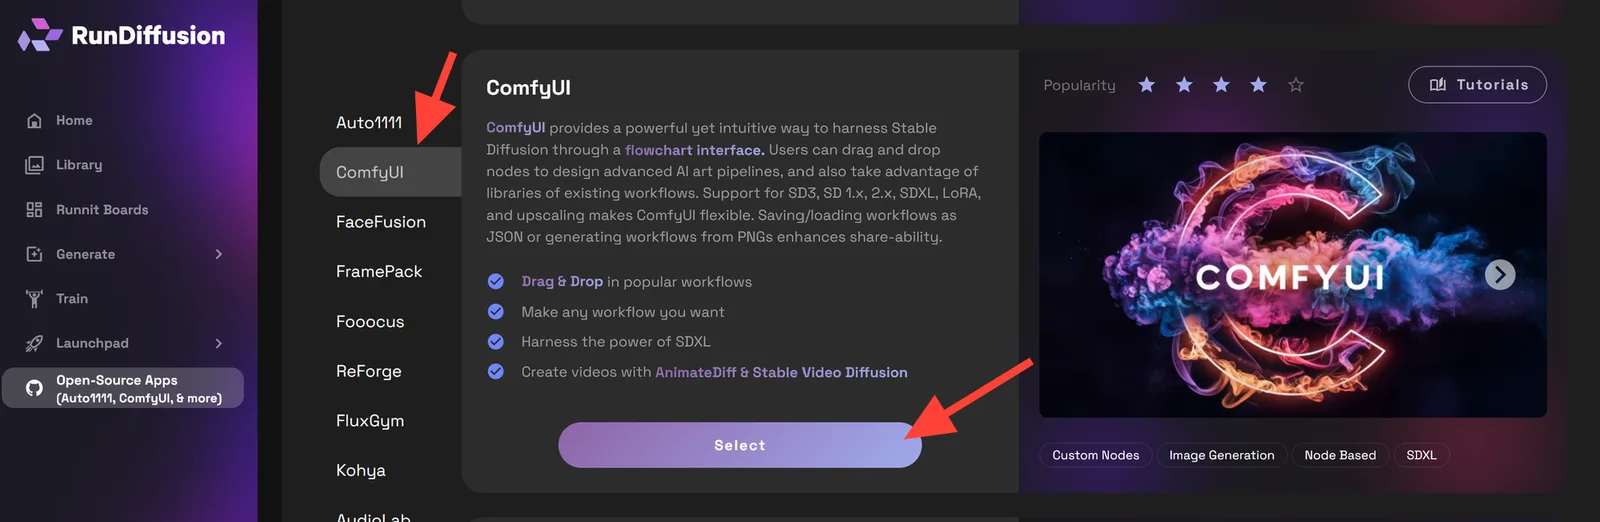
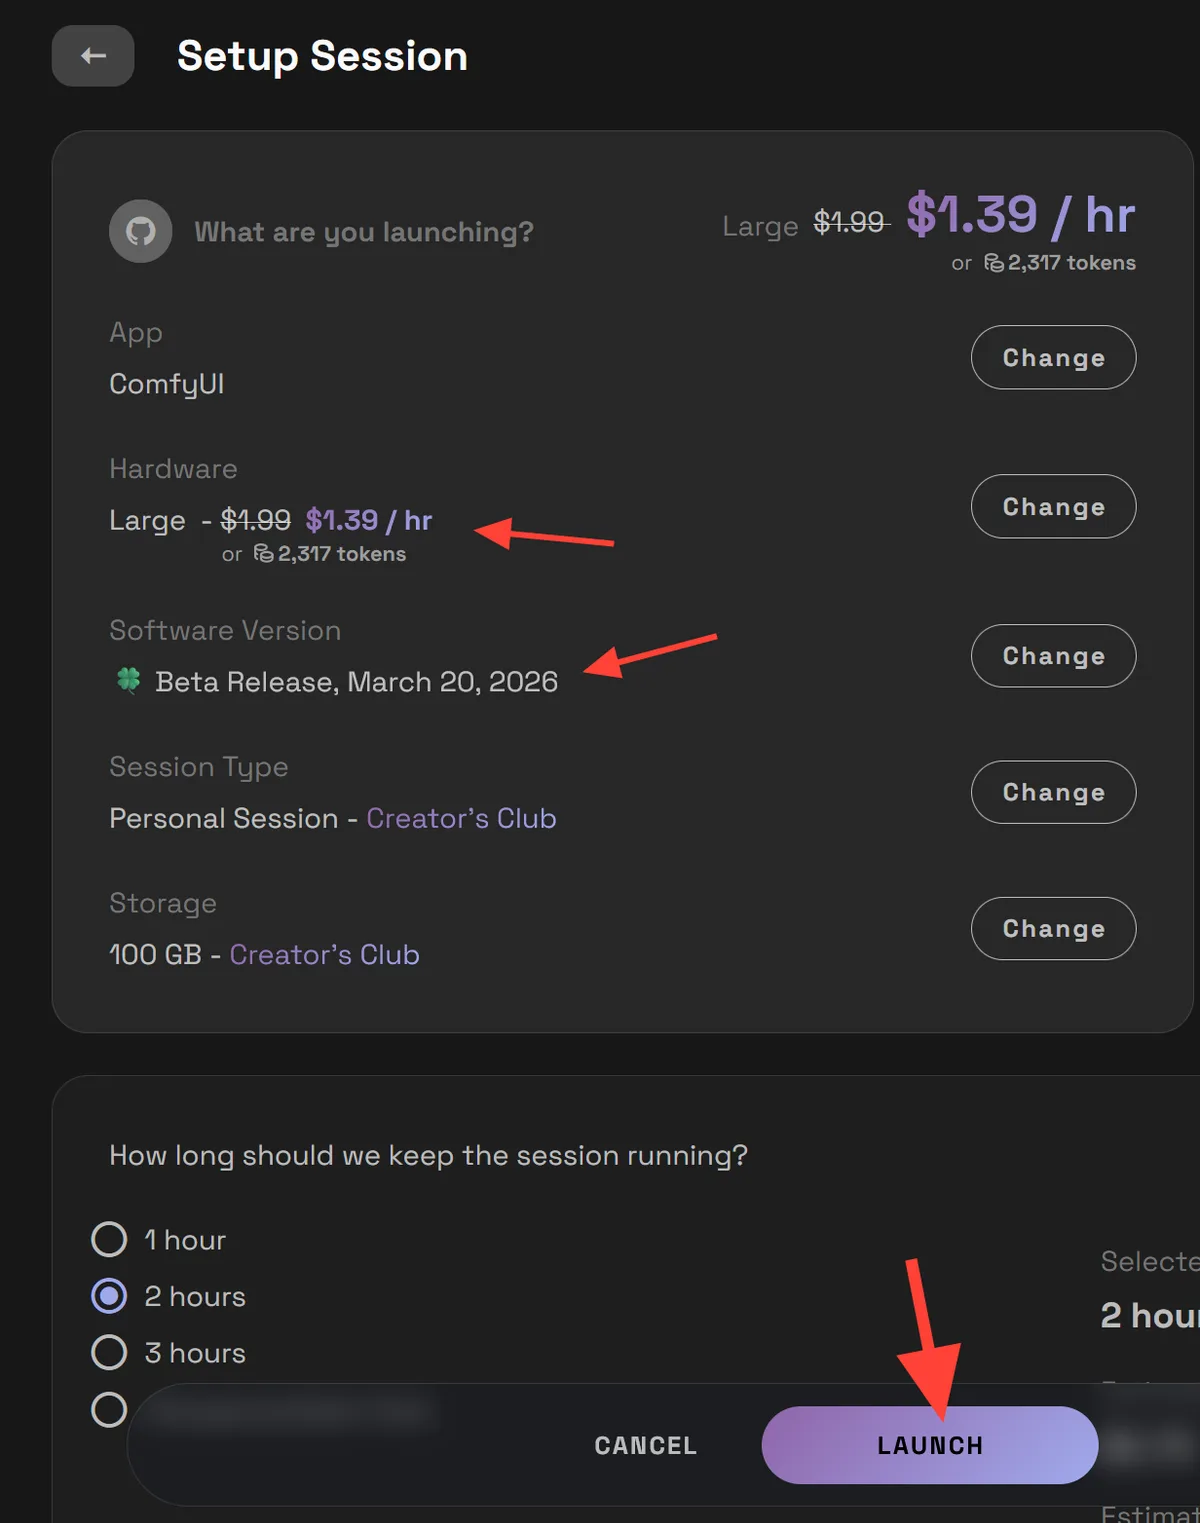
- Choose a Large Server. Choose at least the March 2 Beta build. Click Launch.
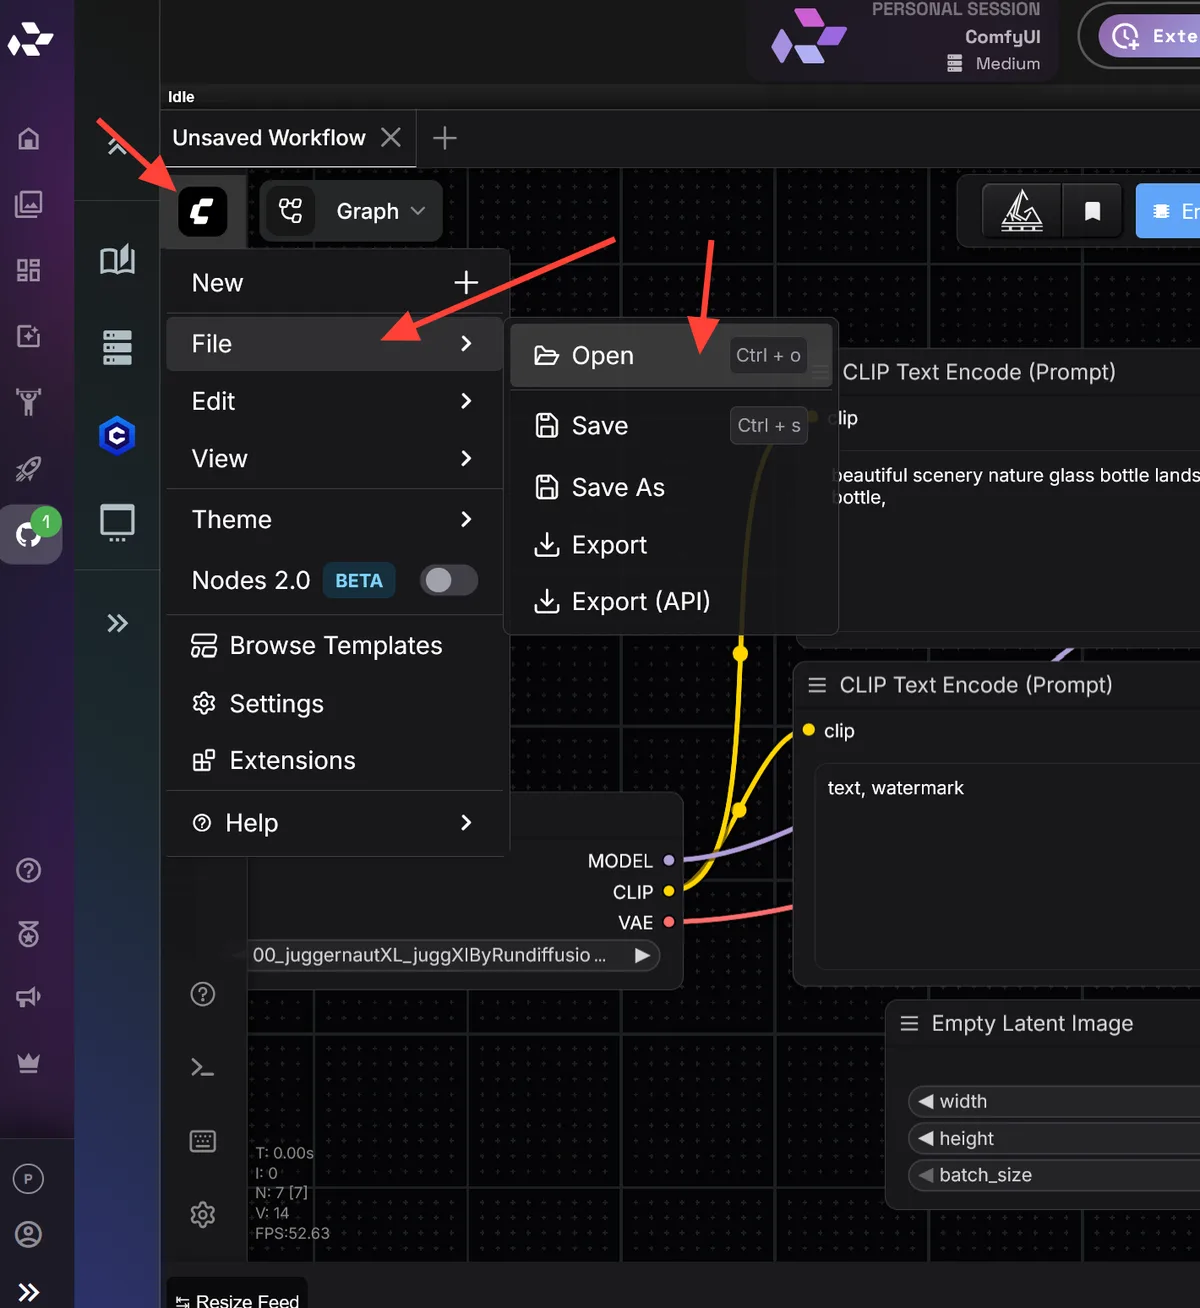
- When ComfyUI opens, load the Juggernaut Z ComfyUI workflow JSON. Download the attached file IMG-JuggernautZ-Txt2Img.json. Click the ComfyUI icon, choose File, click Open, and select the workflow.
Download the IMG-JuggernautZ-Txt2Img workflow JSON
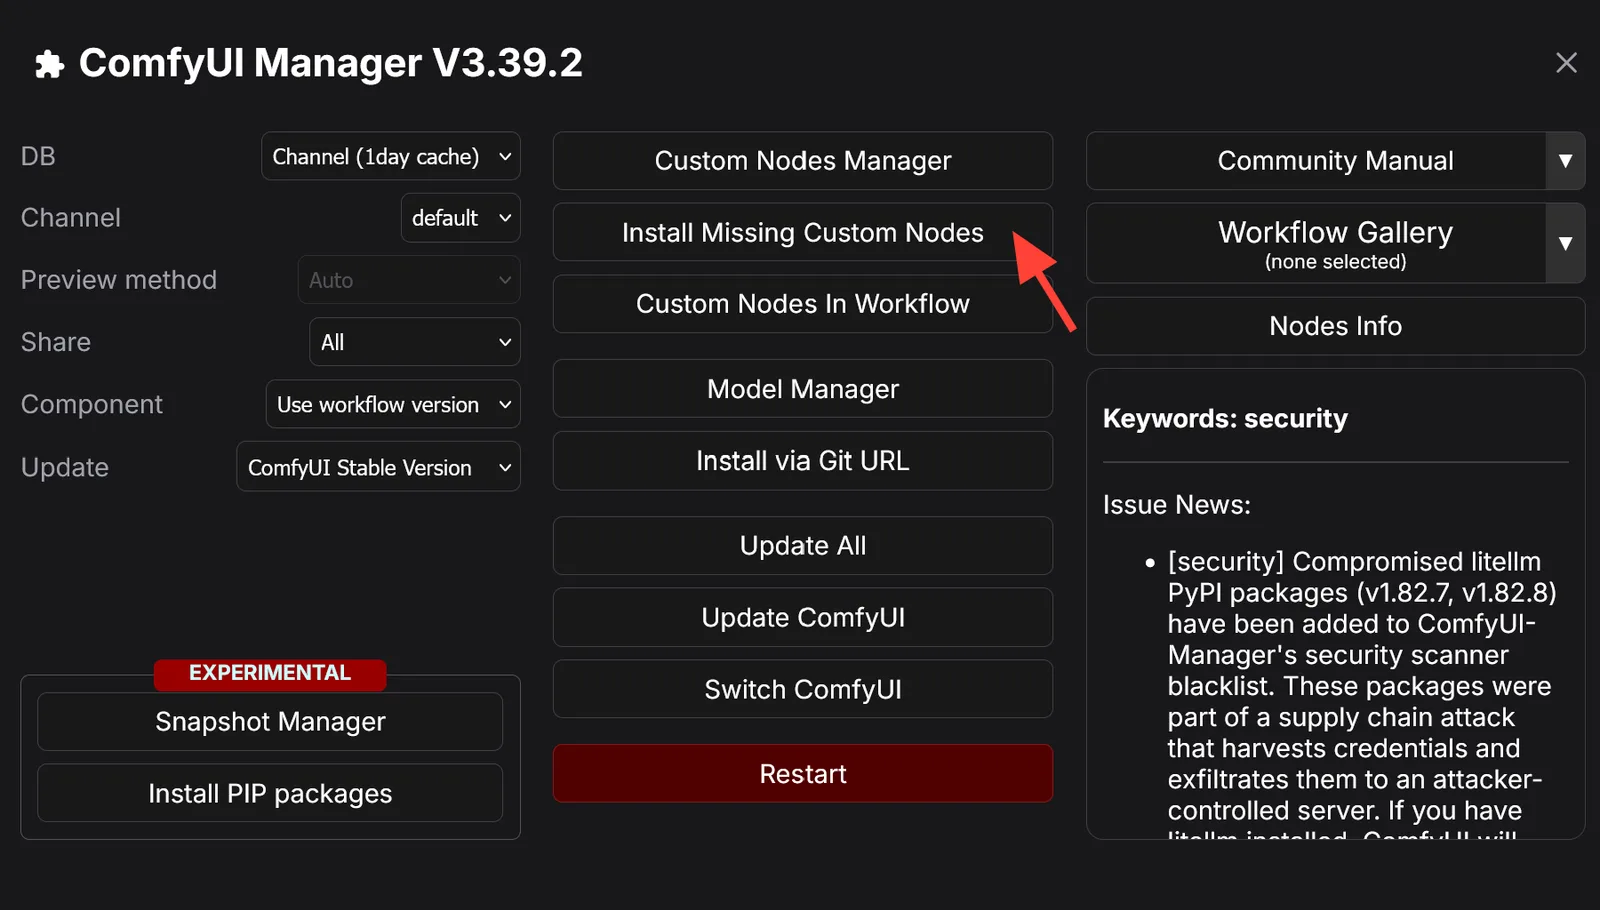
- You will see two nodes that are missing. Click Manager.
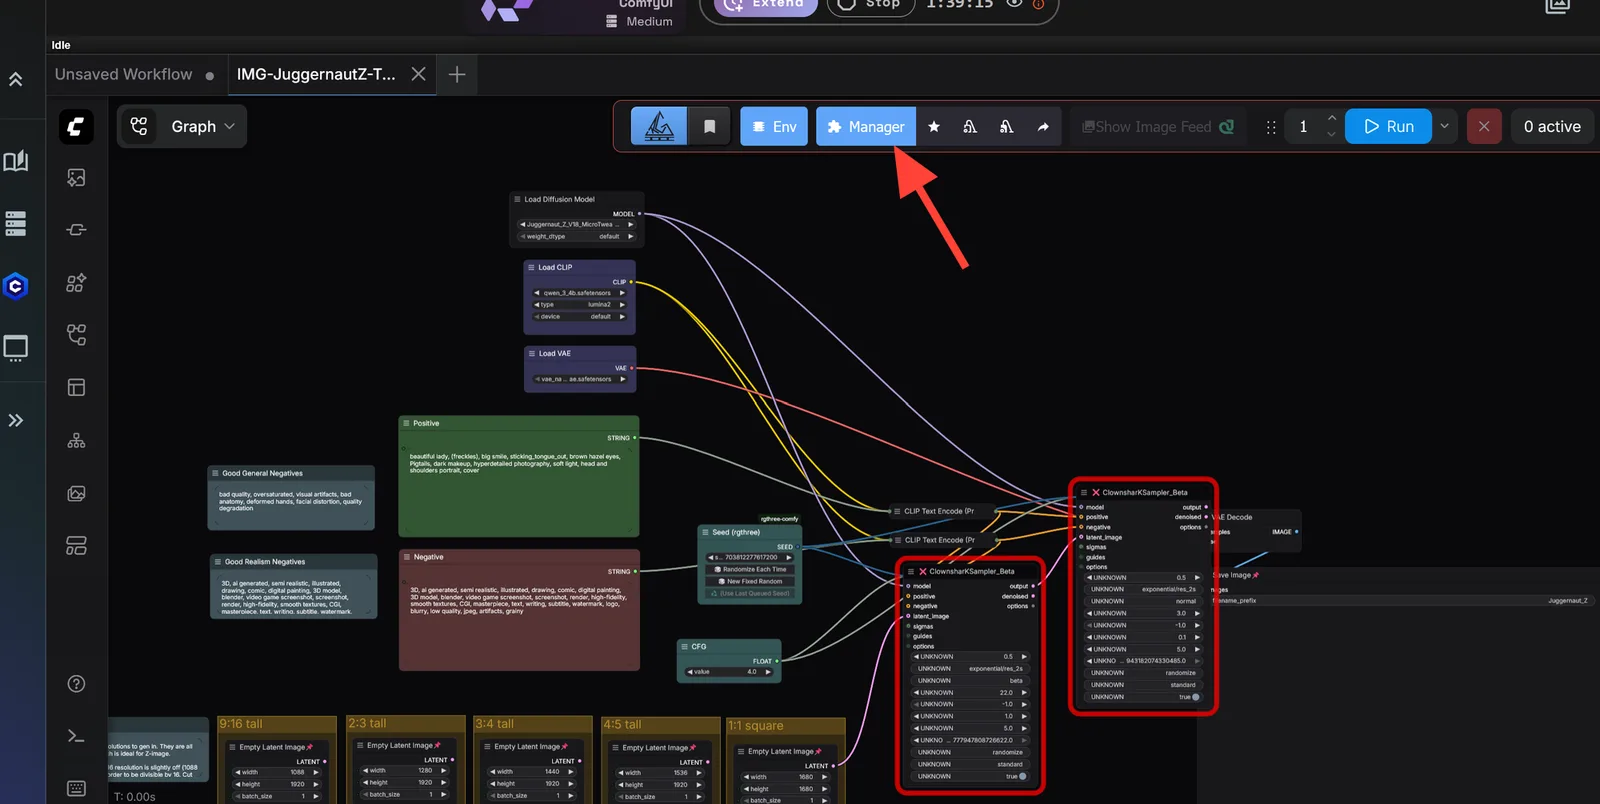
- Then click Install Missing Custom Nodes.
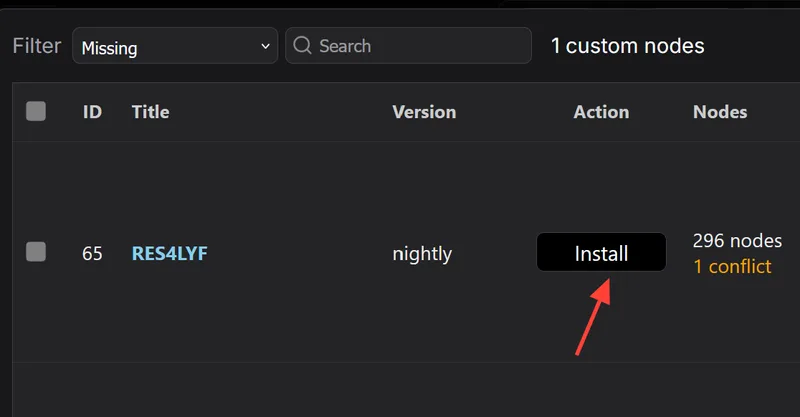
- You should see the RES4LFY node missing. Click Install to install it.
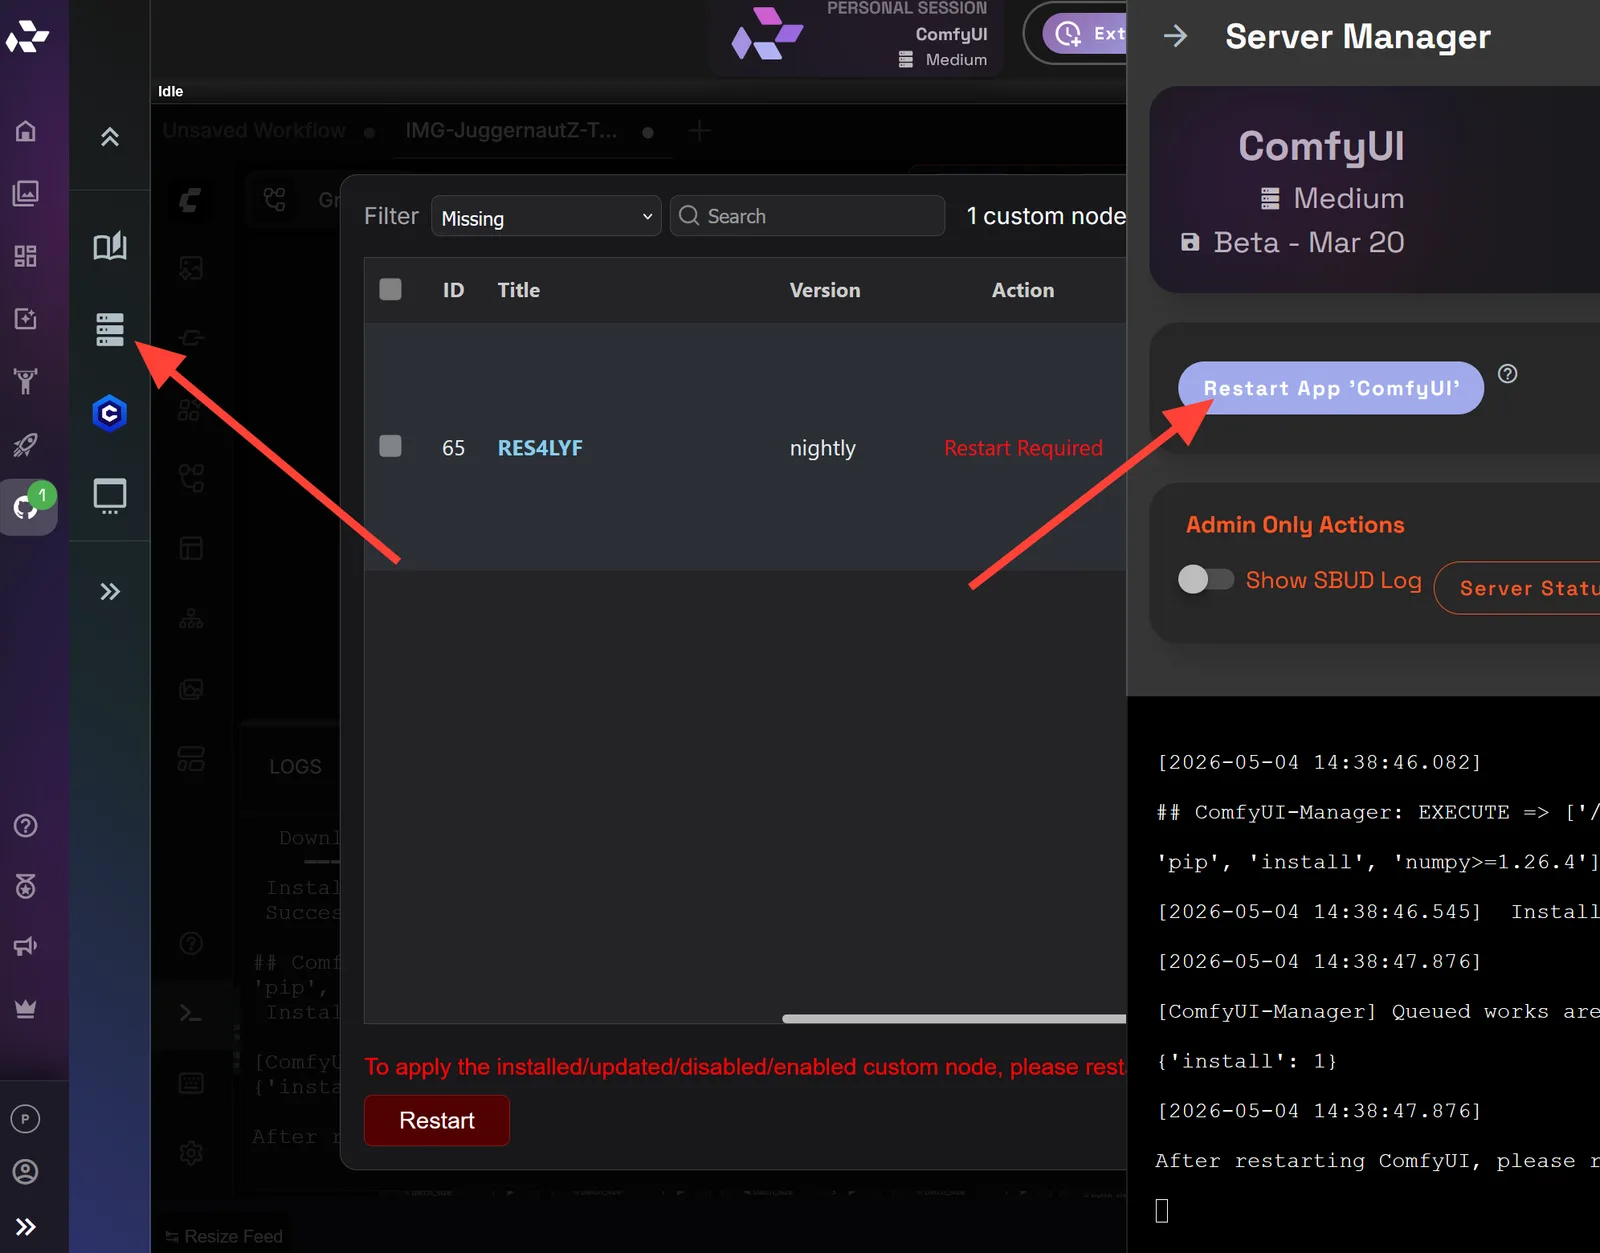
- After the missing node is installed, click the server manager on the left sidebar, then click Restart App 'ComfyUI'.
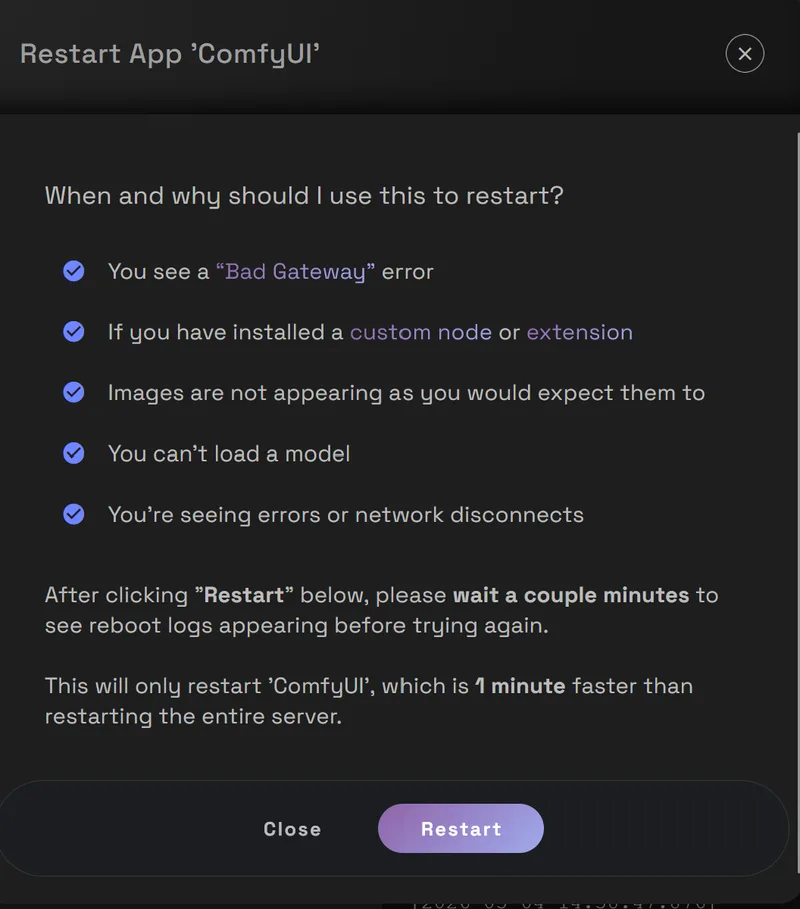
- Then click Restart.
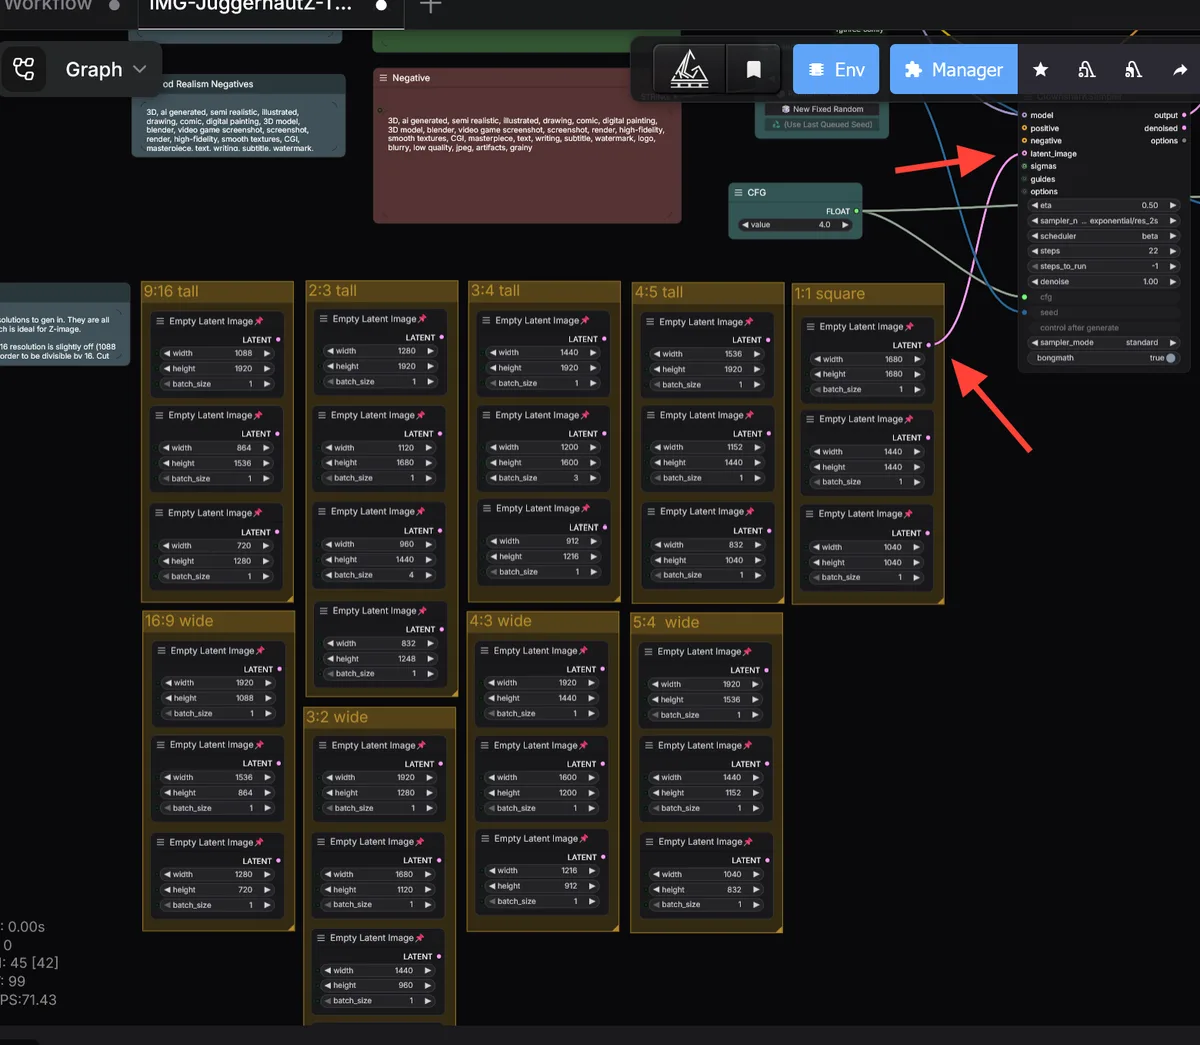
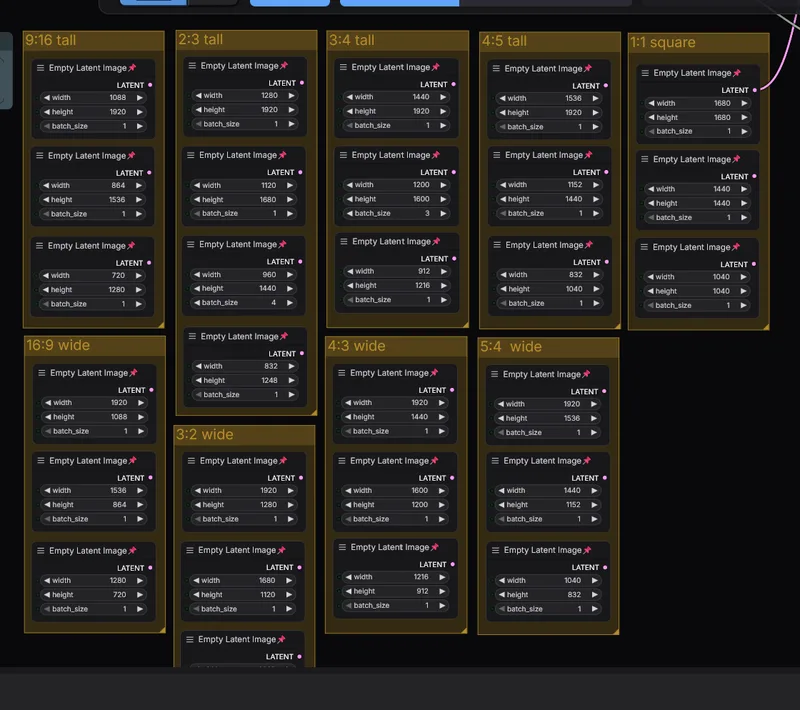
- Once your server has restarted, find the Resolution nodes in the workflow. You can change the resolution by changing the node that is connected to the latent_image input.
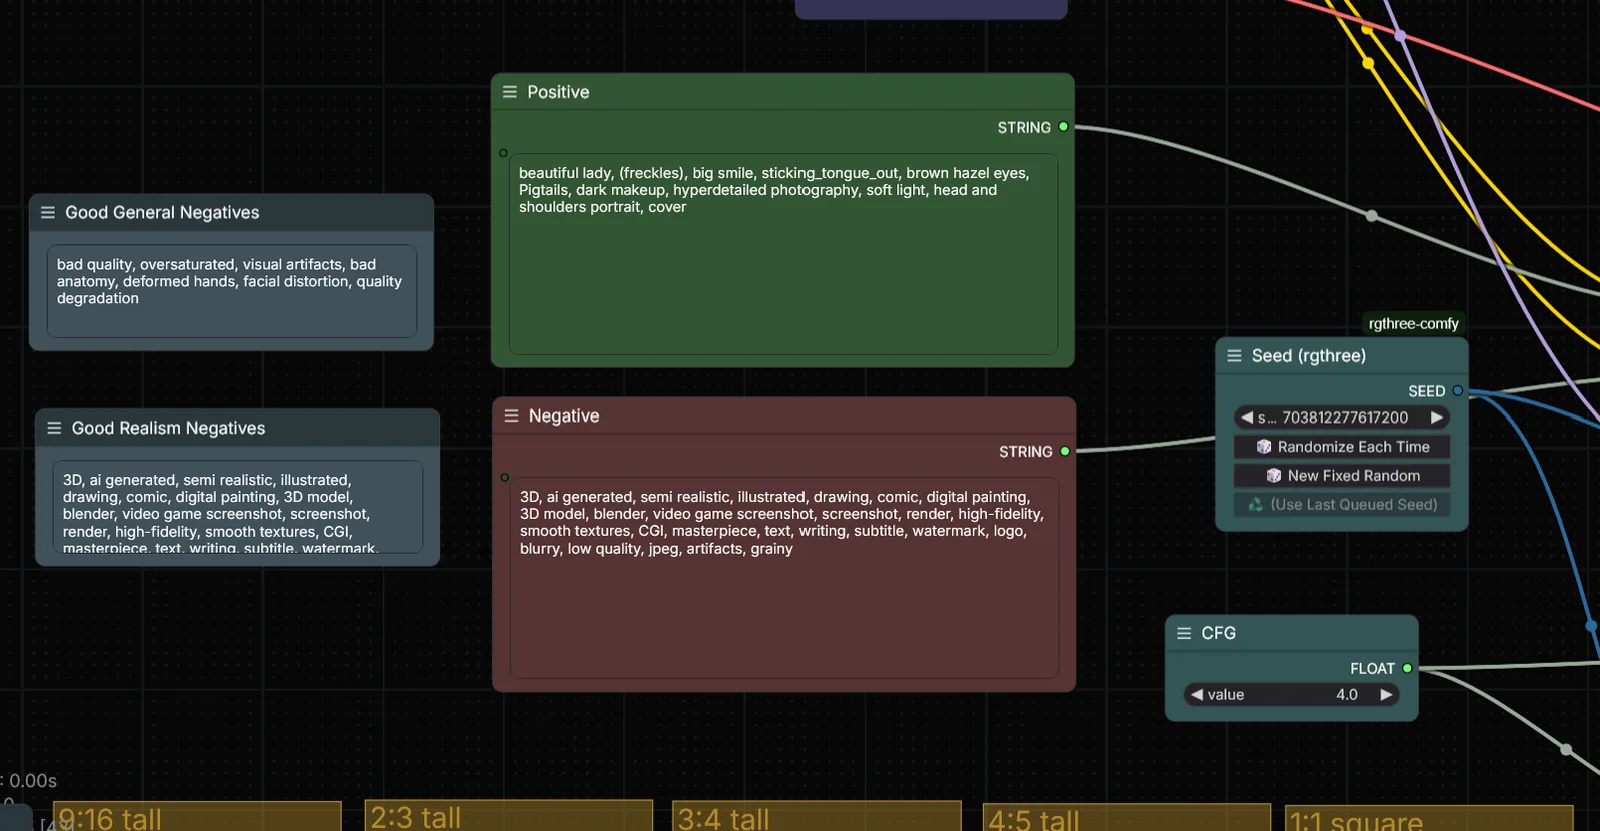
- Enter your prompt in the prompt fields. The default negative prompt is for realistic images. Enter a prompt in the positive prompt for the type of image you want to create. If you need help with prompting, check out our Juggernaut Z prompting guide.
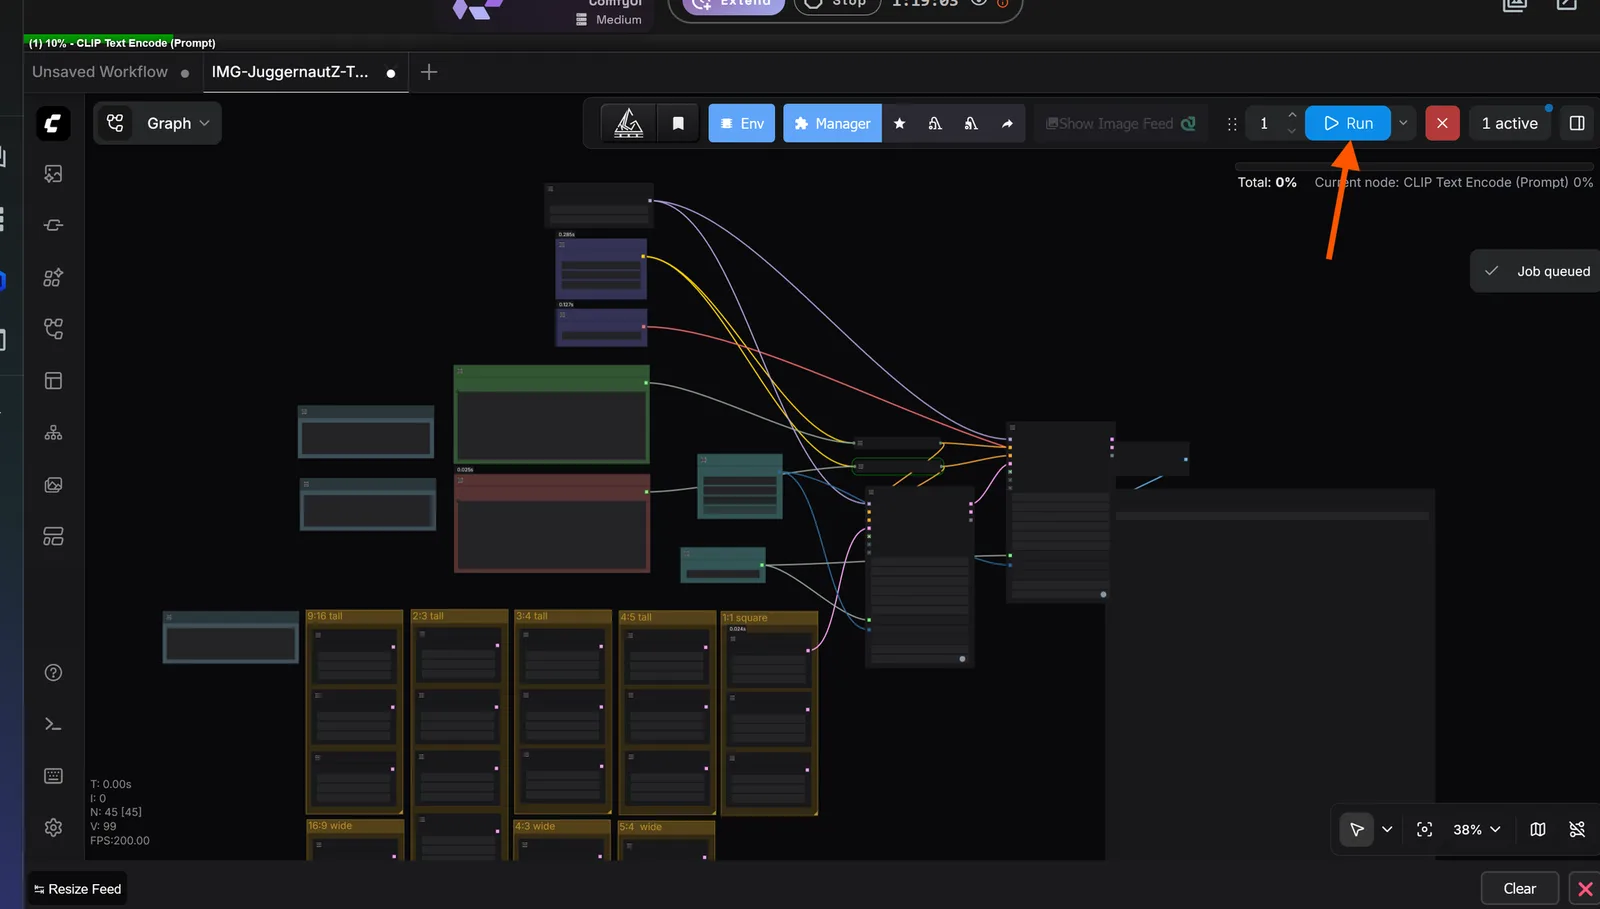
- Click Run.
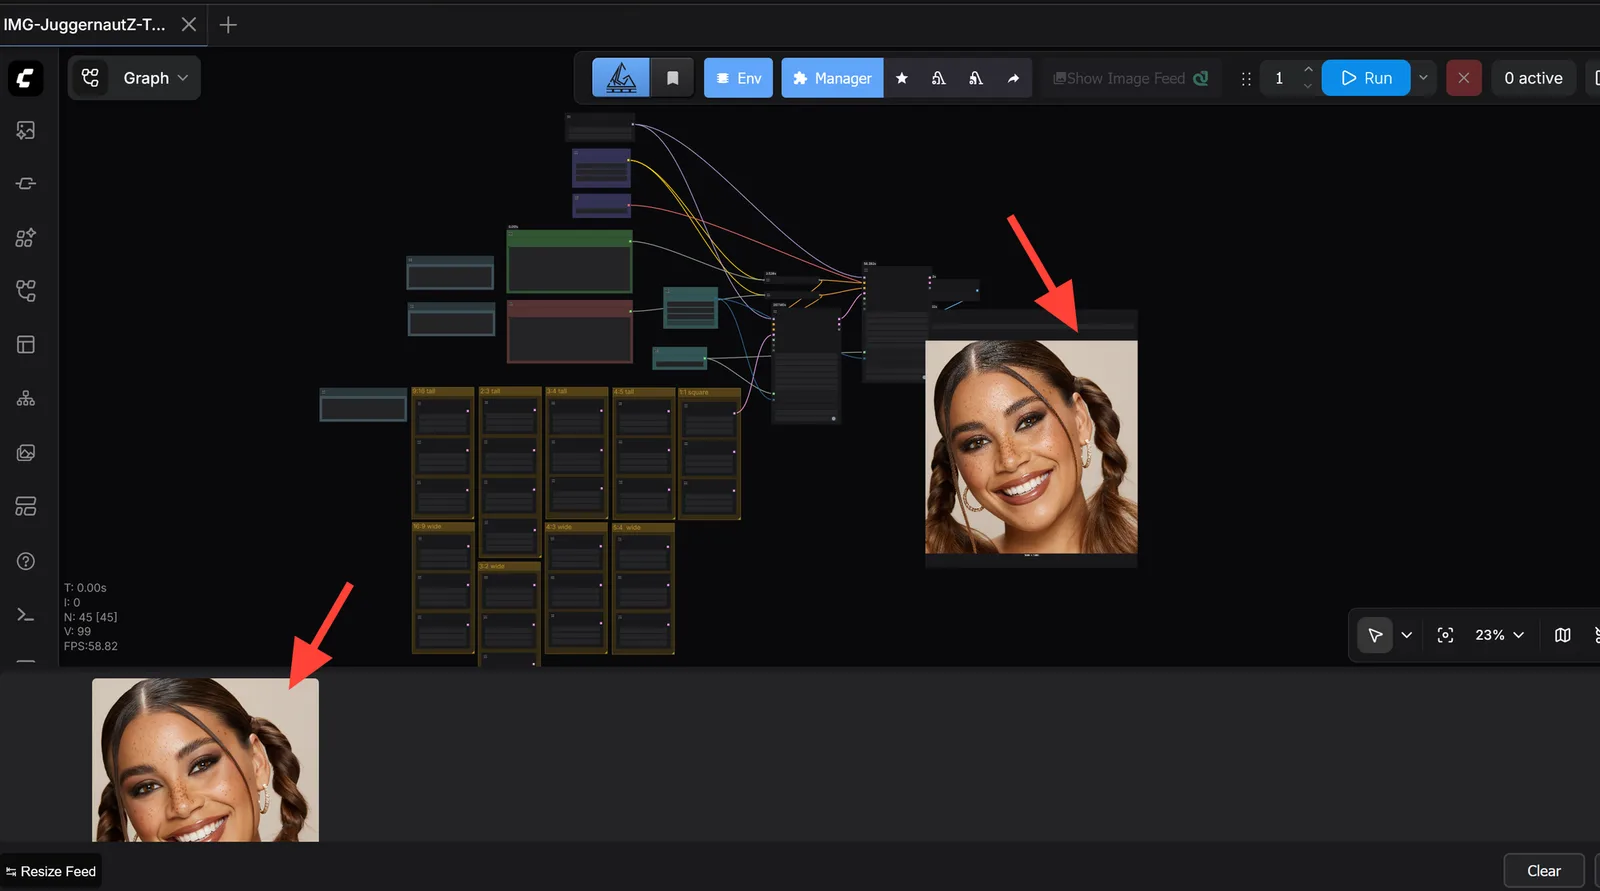
- ComfyUI will process the workflow and generate your image. Once the run finishes, your result will appear in the output preview area defined by the workflow.
Juggernaut Z Workflow JSON
The Juggernaut Z ComfyUI workflow JSON is available below.
Download the IMG-JuggernautZ-Txt2Img workflow JSON
Suggested First Settings
For your first test, keep the setup simple. Load the workflow, choose a normal resolution, write a clear prompt, and run the workflow before changing advanced nodes.
Good starting resolutions include:
- 1024 x 1024 for square images
- 832 x 1216 for portraits or vertical images
- 1216 x 832 for landscapes or horizontal images
Start with a moderate resolution first. Once you confirm the workflow is running correctly, you can increase the size or adjust the workflow for your project.
Prompt Example
Use a prompt that clearly describes the subject, setting, style, lighting, and important details.
Example prompt:
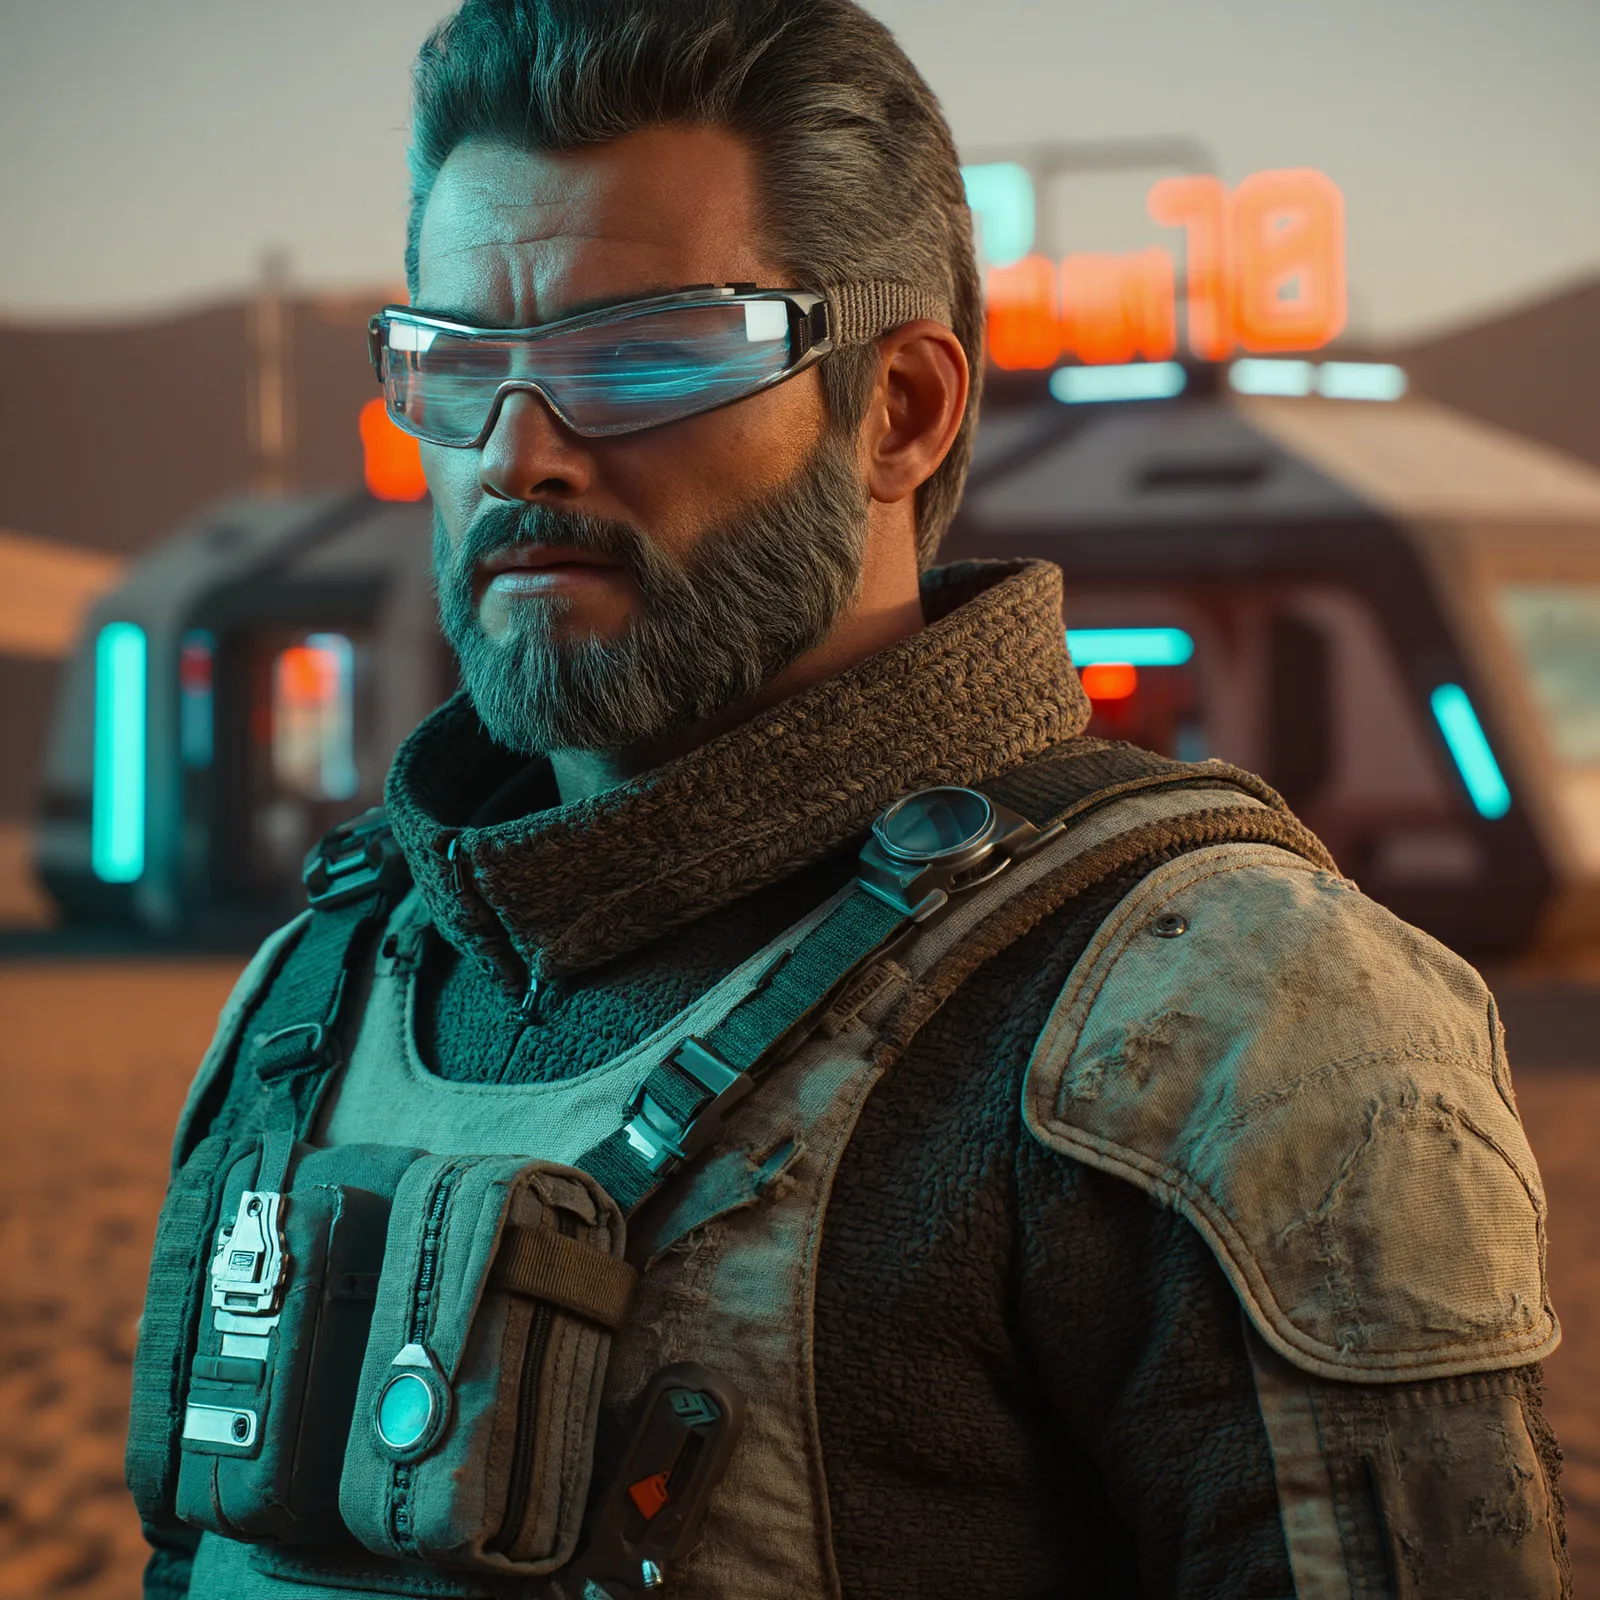
A cinematic portrait of a futuristic explorer standing in a neon-lit desert outpost, dramatic lighting, detailed fabric, realistic textures, shallow depth of field, high detail
Another example:
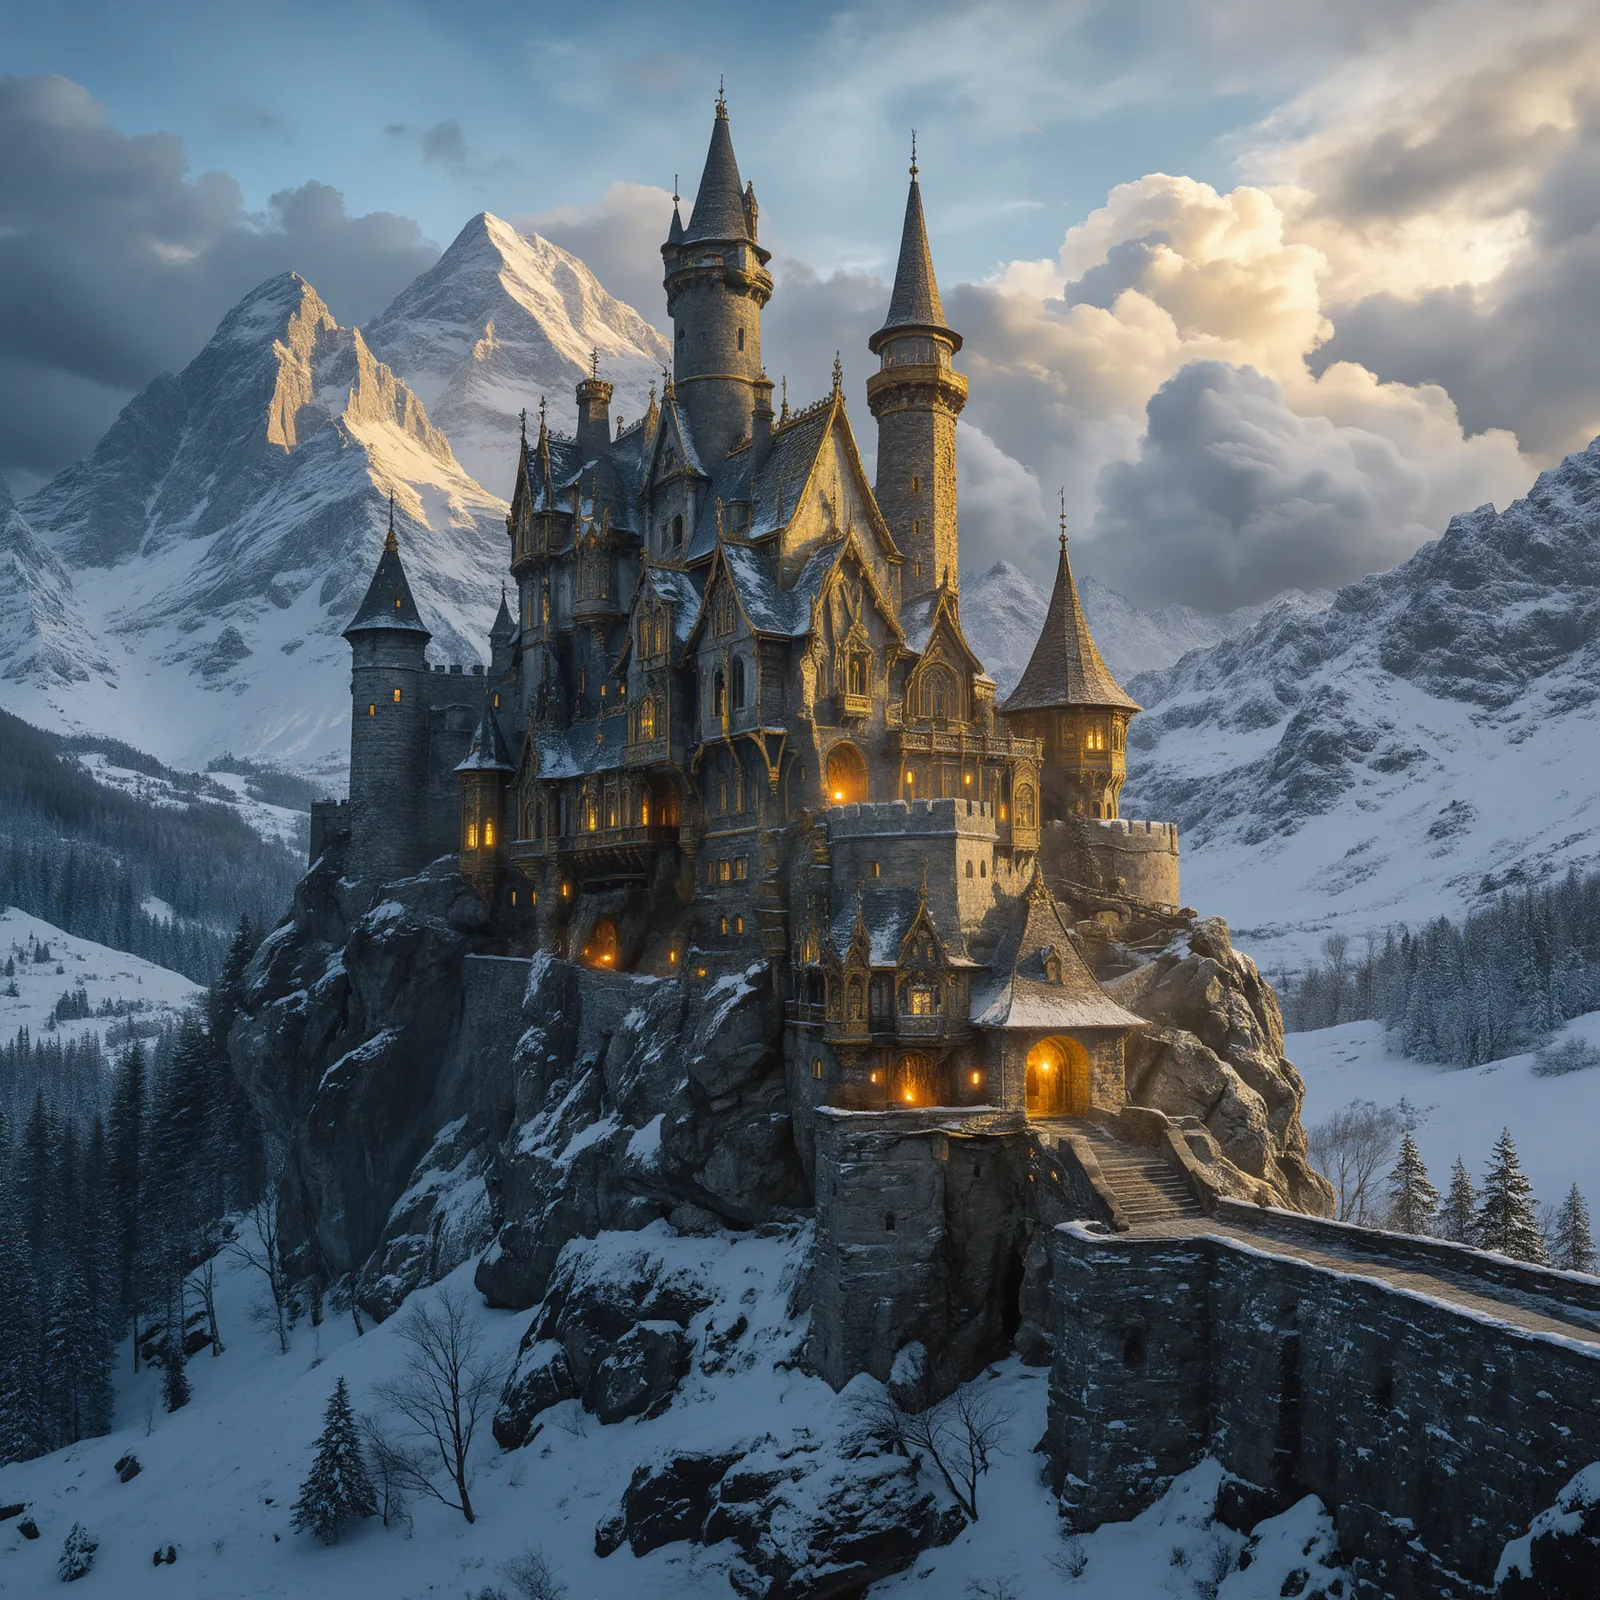
A detailed fantasy castle built into a snowy mountain cliff, warm glowing windows, dramatic clouds, cinematic lighting, highly detailed stone architecture
For better results, avoid vague prompts like "cool fantasy image." Give Juggernaut Z enough visual direction to understand the image you want.
For more detailed prompting help, read the Juggernaut Z prompt guide.
Learn More About Juggernaut Z
Juggernaut Z is designed for users who want high-quality opensource image generation with strong visual detail and flexible prompting. If you want to understand the model before running the ComfyUI workflow, start with the main Juggernaut Z page.
If you already have the workflow open and want better results, use the Juggernaut Z prompt guide alongside your ComfyUI session.
Read the Juggernaut Z Prompt Guide
Do you want to learn about other Juggernaut AI models?
Further Reading
For the best results, keep your first few tests simple. Use the provided workflow, confirm it runs correctly, then start building variations around the look you want.
Run Juggernaut Z in ComfyUI
Launch ComfyUI on RunDiffusion, load the Juggernaut Z workflow JSON, and generate your first image without a local GPU setup.
Frequently asked questions
QWhat do I need before using Juggernaut Z in ComfyUI?
You need a RunDiffusion session with ComfyUI launched from Opensource Applications and the Juggernaut Z workflow JSON loaded into ComfyUI.
QWhich server size does the guide recommend?
The source guide recommends choosing a Large Server and at least the March 2 beta build before launching ComfyUI.
QWhat should I do if ComfyUI shows missing nodes?
Open Manager, choose Install Missing Custom Nodes, install the missing RES4LFY node, and restart the ComfyUI app.
QHow do I change the image size in the workflow?
Find the Resolution nodes and connect the desired resolution node to the latent_image input.
QWhere can I learn better prompt structure for Juggernaut Z?
Use the Juggernaut Z prompt guide for prompt structure, style ideas, and output control.